Easy Cheesy Oven-Baked Breakfast Sliders on Soft Rolls
There’s nothing quite like a lazy Saturday morning, when the rain patters softly against the window, and all you crave is something warm, comforting, and utterly delicious. That’s exactly how these Oven-Baked Breakfast Sliders on Soft Rolls were born in my kitchen!
I remember it vividly: a last-minute brunch invitation from friends, and a refrigerator that felt a little too empty for inspiration. I needed an easy breakfast that looked impressive but required minimal fuss. Combining fluffy eggs, savory breakfast meats, and a gooey cheese blend all nestled in soft, sweet rolls, these sliders became an instant game-changer. They are truly a family favorite!
Since that day, these baked sliders have earned their permanent spot in our weekend rotation. They’re perfect for feeding a crowd, a cozy brunch, or even a simple, satisfying weeknight ‘brinner.’ Trust me, this tested recipe is about to become your new go-to comfort food.

Why You’ll Love These Oven-Baked Breakfast Sliders
❤️ Here’s why these sliders will become a staple in your kitchen:
- Effortlessly Easy: With minimal prep and hands-on time, these sliders come together in a flash. You can assemble them the night before for an even quicker morning!
- Crowd-Pleasing Perfection: Whether it’s a holiday brunch, a potluck, or just a family gathering, these sliders are always the first to disappear. They’re designed to feed a hungry group with ease.
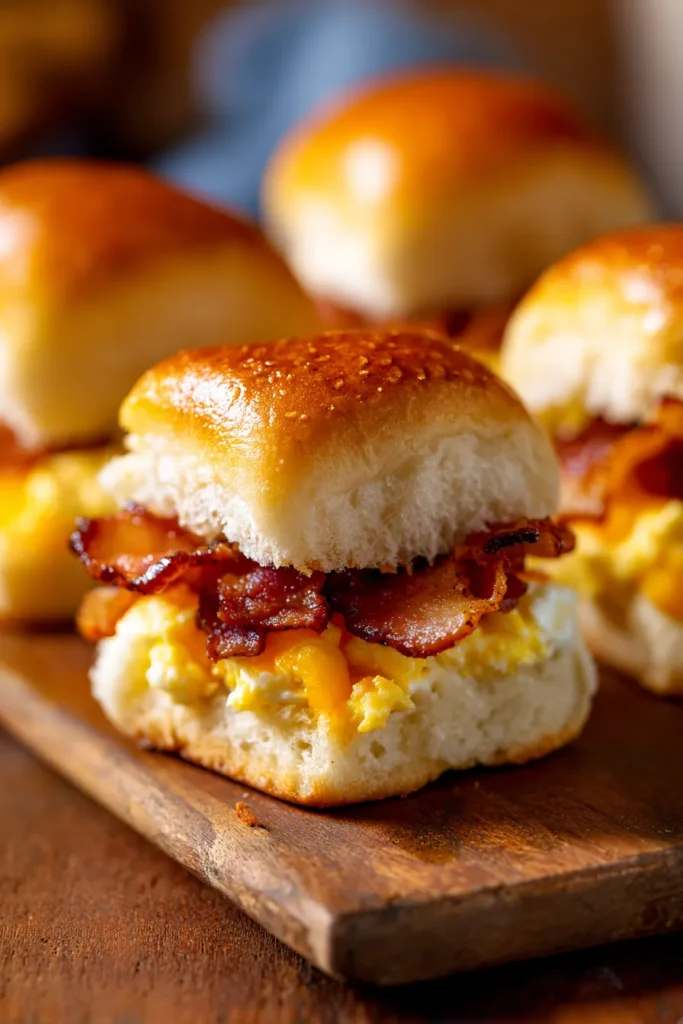
- Flavor Explosion: Imagine fluffy scrambled eggs, crispy bacon or savory sausage, and two kinds of gooey, melted cheese, all baked into soft, slightly sweet rolls. The buttery, savory glaze on top takes them to another level!
- Customization King: This recipe is incredibly versatile! Swap out the meats, try different cheeses, or even sneak in some veggies. It’s a blank canvas for your breakfast creativity.
- Portable & Perfect for Meal Prep: They’re easy to transport to a gathering, and leftovers (if there are any!) reheat beautifully for quick breakfasts during the week.
- Comfort Food at Its Finest: There’s something inherently comforting about warm, cheesy, eggy goodness tucked into a soft roll. It’s pure edible hug material.
- Kid-Friendly: Even the pickiest eaters will adore these sliders! They’re small, easy to handle, and packed with flavors kids love.
- Minimal Cleanup: Baked in a single pan, cleanup is surprisingly simple, leaving you more time to enjoy your delicious creation and company.
- Tested and Approved: This recipe has been made countless times, tweaked, and perfected to ensure maximum deliciousness and ease every single time.
What You Need
You only need a few simple pantry staples for this recipe! Most of these ingredients you might already have on hand, making this a perfect impromptu meal. Check the full printable recipe card below for detailed measurements.

💡 Expert Tips for the Best Breakfast Sliders
- Choose Your Rolls Wisely: Hawaiian sweet rolls are highly recommended! Their inherent sweetness and soft texture perfectly complement the savory filling and buttery glaze. If you can’t find them, any soft dinner roll will work.
- Perfectly Cooked Eggs: For the best texture, scramble your eggs just until they are set but still slightly moist. They will continue to cook in the oven, and you want to avoid dry, rubbery eggs.
- Crisp Up Your Meat: Whether you’re using bacon or sausage, make sure it’s cooked until crispy before adding it to the sliders. This adds a fantastic textural contrast.
- Don’t Skimp on the Cheese: A combination of cheeses, like sharp cheddar for flavor and mozzarella for meltiness, creates the ultimate gooey center. Grate your own cheese for superior melting!
- The Secret Glaze: The savory-sweet butter glaze is what truly makes these sliders shine. Whisk it well to ensure all the flavors are incorporated before brushing it generously over the tops of the rolls. Don’t forget to brush the sides too!
- Prevent Soggy Bottoms: To ensure your rolls don’t get soggy, you can lightly toast the bottom halves in a dry skillet for a minute or two before assembling. Also, avoid soaking the bottom rolls too much with the butter mixture.
- Cover During Baking: For the initial bake, covering the sliders with foil helps to heat everything through and melt the cheese evenly without browning the tops too quickly. Remove the foil for the last few minutes to get that beautiful golden-brown crust.
- Let Them Rest: Once out of the oven, let the sliders rest for 5-10 minutes before slicing and serving. This allows the cheese to set slightly, preventing it from oozing out excessively when cut.
- Prep Ahead Magic: Assemble the sliders the night before, cover them tightly with plastic wrap, and refrigerate. In the morning, just pop them in the oven (you might need to add a few extra minutes to the baking time).
- Serve Warm: These sliders are best enjoyed warm, straight from the oven, when the cheese is at its gooey, melty peak.
Variations & Substitutions
Get creative with your sliders! Here are some ideas to make them your own:
- Meaty Mix-ups: Instead of or in addition to bacon, try cooked breakfast sausage crumbles, diced ham, or even thinly sliced deli turkey.
- Cheesy Choices: Experiment with different cheeses! Swiss, provolone, Monterey Jack, or a spicy pepper jack would all be delicious.
- Veggie Boost: Sauté finely diced bell peppers, onions, or spinach and add them to the egg mixture for extra flavor and nutrition.
- Spice It Up: Add a pinch of red pepper flakes to the egg mixture or a dash of hot sauce to the butter glaze for a kick.
- Gluten-Free: Simply use your favorite gluten-free dinner rolls to make this recipe accommodating.
- Keto-Friendly: Skip the rolls entirely and bake the egg, meat, and cheese mixture in individual ramekins or a small baking dish for a delicious, low-carb breakfast casserole.
- Vegan Version: Use plant-based egg substitutes, vegan cheese shreds, and plant-based sausage patties or crumbles. Opt for a vegan butter alternative for the glaze.

Storage & Freezing
These Oven-Baked Breakfast Sliders are best enjoyed fresh, but they can be stored and reheated:
- Refrigerator: Store any leftover sliders in an airtight container in the refrigerator for up to 3-4 days.
- Reheating: For best results, reheat them in a preheated oven at 300°F (150°C) for 10-15 minutes, or until warmed through and the cheese is melty again. You can also microwave individual sliders for 30-60 seconds, though the rolls might become a bit softer.
- Freezing: While you *can* freeze cooked sliders, the texture of the eggs and rolls might change slightly upon thawing. It’s best to freeze the cooked individual components (eggs, meat) and assemble fresh. If freezing assembled, wrap tightly in plastic wrap and then foil, freeze for up to 1 month. Thaw overnight in the fridge and reheat as above.
FAQ
Can I assemble these breakfast sliders ahead of time?
Absolutely! You can assemble the sliders, cover them tightly with plastic wrap, and store them in the refrigerator for up to 12 hours before baking. This makes them perfect for an easy morning breakfast or brunch prep.
What kind of rolls work best for sliders?
Hawaiian sweet rolls are highly recommended due to their soft texture and subtle sweetness that complements the savory filling. However, any soft dinner roll or brioche bun can be used as a substitute.
Can I use different breakfast meats?
Yes, definitely! Feel free to use cooked sausage patties, ground sausage crumbles, diced ham, or even turkey bacon. The key is to have the meat cooked beforehand.
How do I prevent the bottom of the rolls from getting soggy?
To prevent soggy bottoms, you can lightly toast the cut sides of the bottom rolls in a dry pan for a minute or two before assembling. Also, ensure you don’t saturate the bottom rolls too heavily with the butter glaze when brushing.
And there you have it! Your new favorite easy breakfast or brunch recipe. These Oven-Baked Breakfast Sliders on Soft Rolls are truly a gift to your taste buds and your schedule. I hope you love them as much as my family does!
Don’t forget to Pin this recipe for later and share your creations with me. Happy cooking!
Easy Cheesy Oven-Baked Breakfast Sliders on Soft Rolls
Ingredients
- 12 Hawaiian sweet rolls (King's Hawaiian)
- 6 large eggs
- 1/4 cup milk
- 1/2 teaspoon salt
- 1/4 teaspoon black pepper
- 6 slices bacon, cooked and crumbled (or 1 cup cooked breakfast sausage crumbles)
- 1 cup shredded sharp cheddar cheese
- 1 cup shredded mozzarella cheese
- 1/2 cup unsalted butter, melted
- 2 tablespoons maple syrup (or brown sugar)
- 1 tablespoon Dijon mustard
- 1 teaspoon Worcestershire sauce
- 1/2 teaspoon onion powder
- 1/2 teaspoon garlic powder
Instructions
- Step 1 Preheat oven to 350°F (175°C). Lightly grease a 9x13 inch baking dish.
- Step 2 In a large bowl, whisk together eggs, milk, salt, and pepper until well combined. Cook scrambled eggs in a non-stick skillet over medium heat until just set. Do not overcook.
- Step 3 Slice the entire slab of Hawaiian rolls horizontally, keeping the tops and bottoms intact. Place the bottom halves of the rolls in the prepared baking dish.
- Step 4 Layer half of the shredded cheddar and mozzarella cheese over the bottom rolls.
- Step 5 Spread the cooked scrambled eggs evenly over the cheese layer.
- Step 6 Sprinkle the cooked and crumbled bacon (or sausage) over the eggs.
- Step 7 Top with the remaining shredded cheddar and mozzarella cheese.
- Step 8 Place the top halves of the rolls over the filling.
- Step 9 In a small bowl, whisk together the melted butter, maple syrup, Dijon mustard, Worcestershire sauce, onion powder, and garlic powder until fully combined.
- Step 10 Pour or brush the butter mixture evenly over the top of the sliders, ensuring it coats all the rolls.
- Step 11 Cover the baking dish loosely with aluminum foil and bake for 15 minutes. This helps the cheese melt and warms everything through.
- Step 12 Remove the foil and bake for another 10-15 minutes, or until the tops are golden brown and the cheese is bubbly and melted.
- Step 13 Let the sliders rest for 5 minutes before slicing them along the roll seams and serving warm.