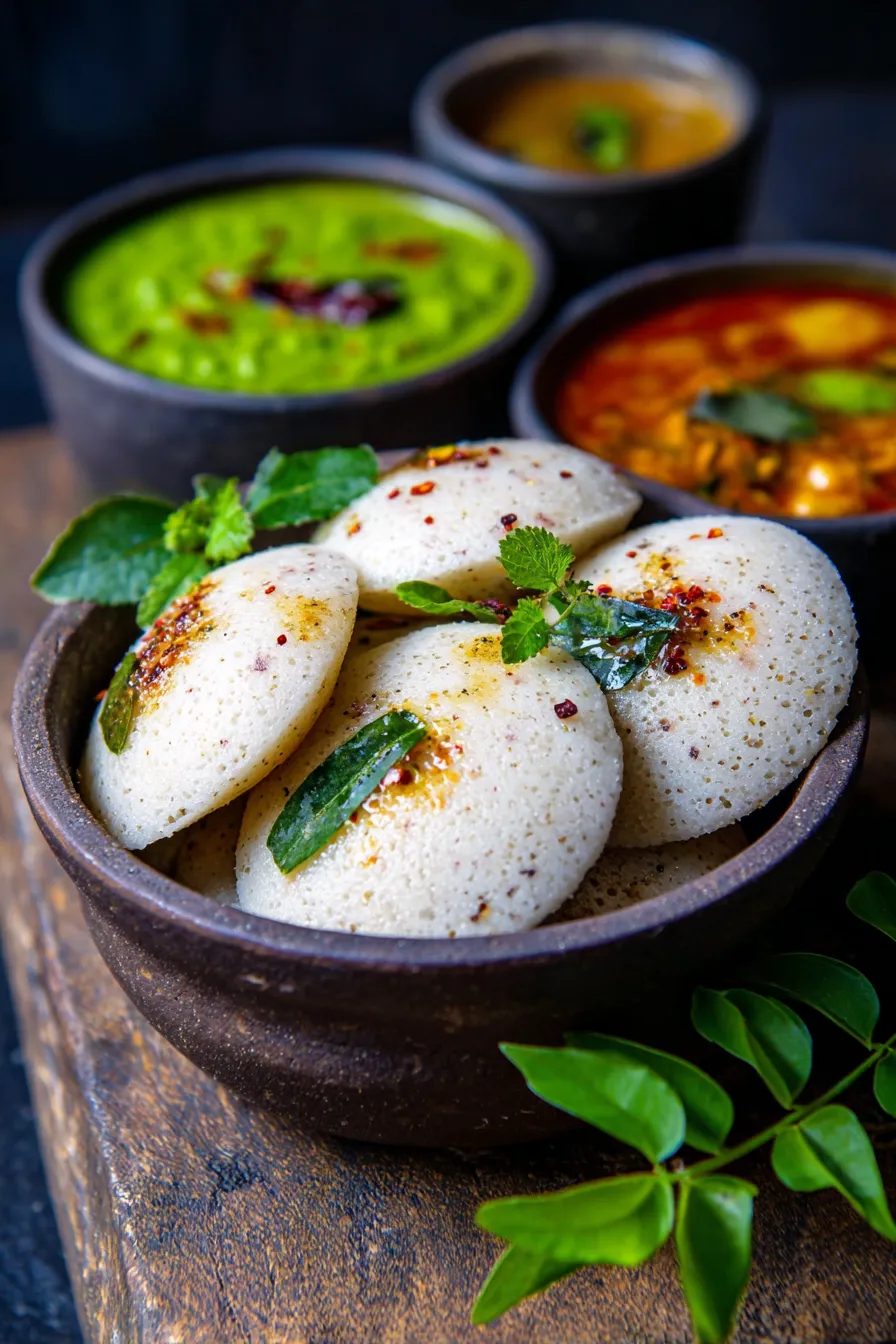
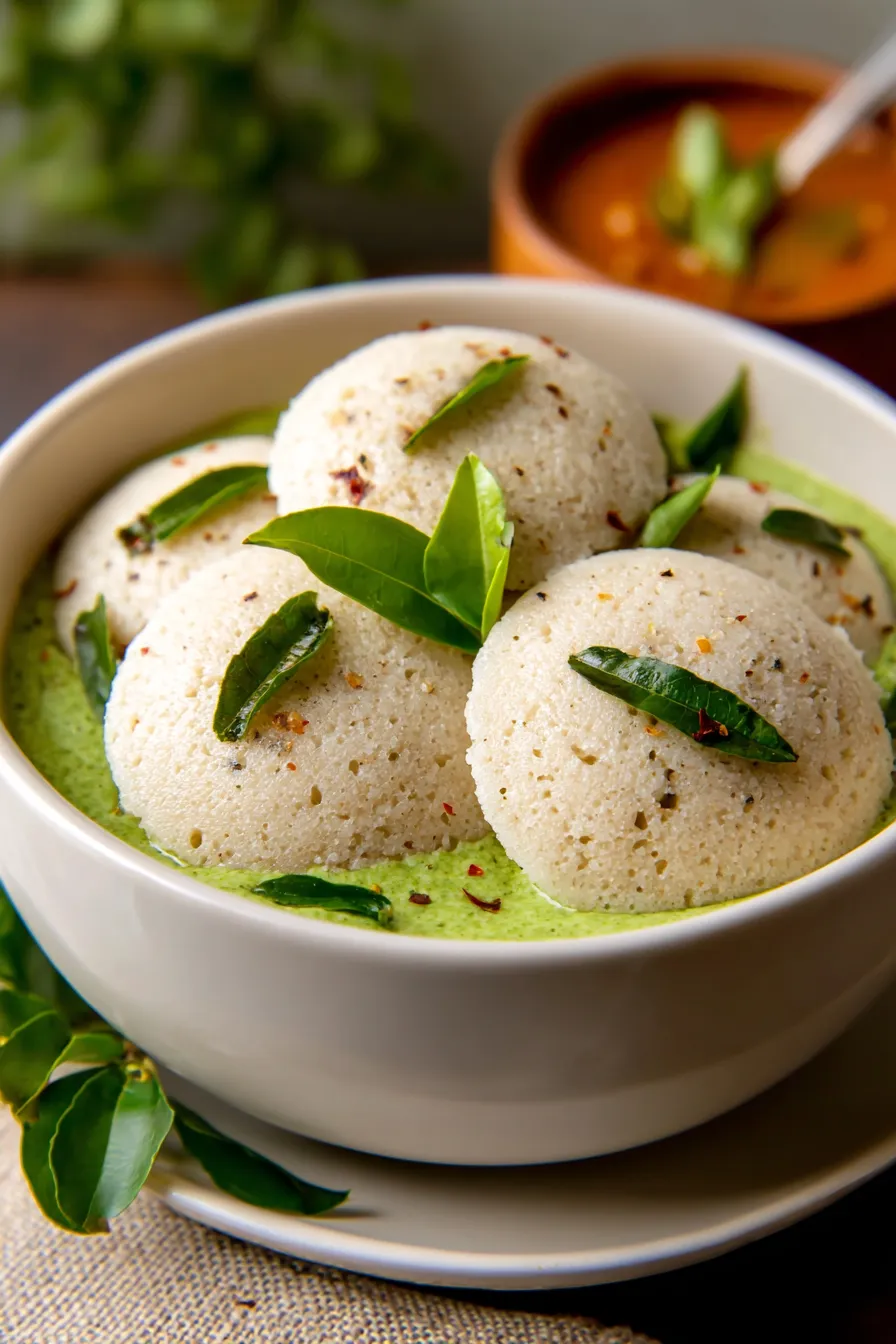
One-Pot Ragi Idli: Healthy Indian Breakfast for Busy Mornings
My earliest memories of breakfast always involve the comforting aroma of freshly made idlis. Growing up, Sundays were special; my Amma would wake up early, and the kitchen would hum with the gentle sizzle of idlis steaming. I remember one particular rainy Sunday, when she was juggling a million things, and instead of her usual elaborate fare, she whipped up this incredible One-Pot Ragi Idli Indian Recipes | Healthy Breakfast. It was a revelation! So soft, so wholesome, and best of all, incredibly easy. It quickly became our go-to for a quick, nutritious start to the day.
This treasured family favorite is a game-changer for anyone looking for an easy breakfast solution. It’s packed with goodness, remarkably simple to prepare, and guarantees a delicious, healthy meal without the fuss. My tested recipe makes fluffy, delicious ragi idlis that will become your new healthy comfort food obsession.
Why You’ll Love This Recipe
- True One-Pot Wonder: Seriously, everything comes together in one pot (or mixing bowl before steaming). No separate grinding of rice and dal, no complex fermentation schedules. This streamlined process cuts down on prep time, dishwashing, and kitchen chaos. It’s designed for efficiency, perfect for busy weekday mornings or lazy weekend brunches when you want maximum flavor with minimum effort.
- Beginner-Friendly Perfection: New to Indian cooking? Or perhaps new to making idlis? This recipe is incredibly forgiving and practically foolproof. We’re skipping the traditional, lengthy fermentation process often associated with idlis, making it accessible to everyone. You’ll achieve perfectly soft, spongy idlis on your very first try, guaranteed to impress yourself and your family.
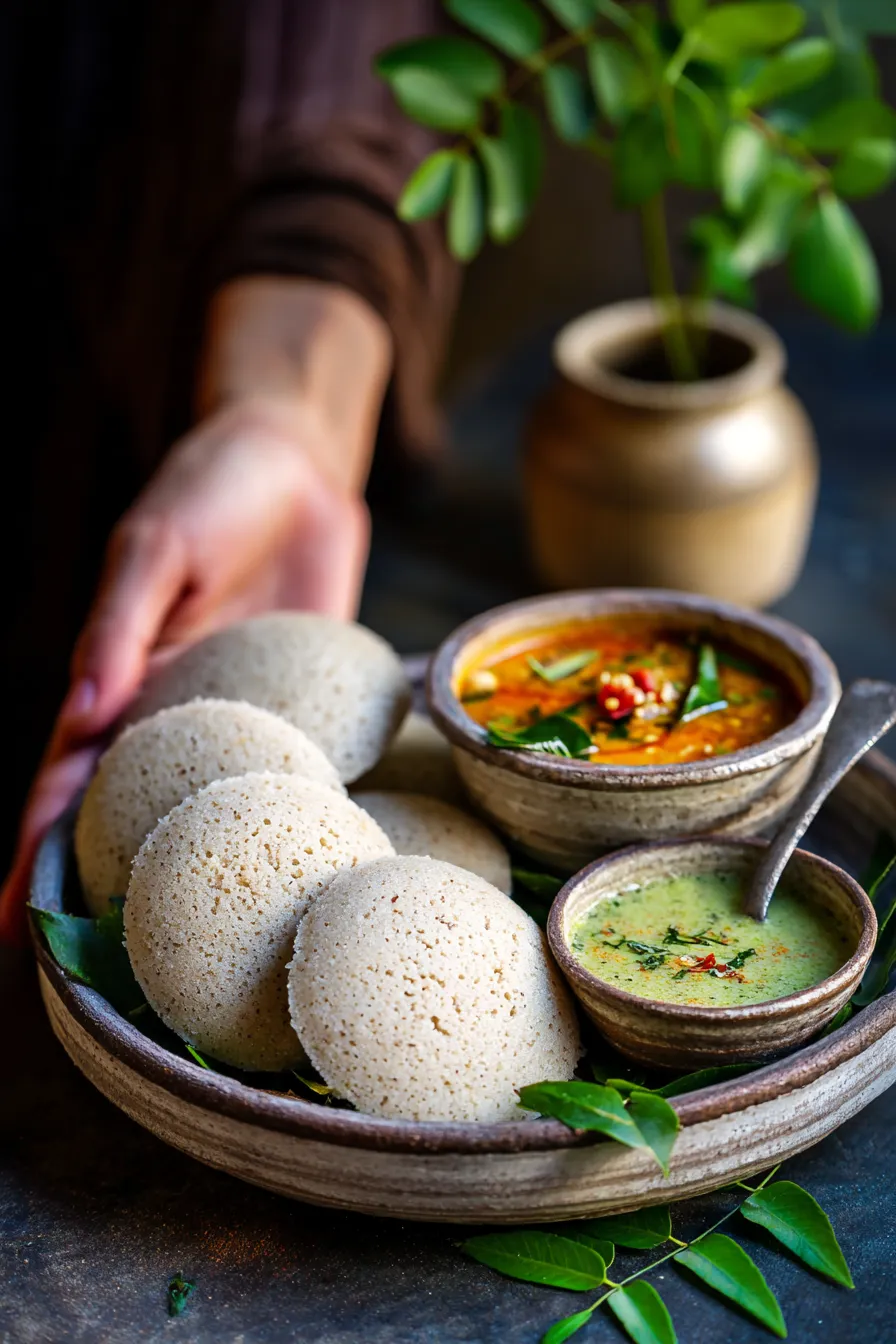
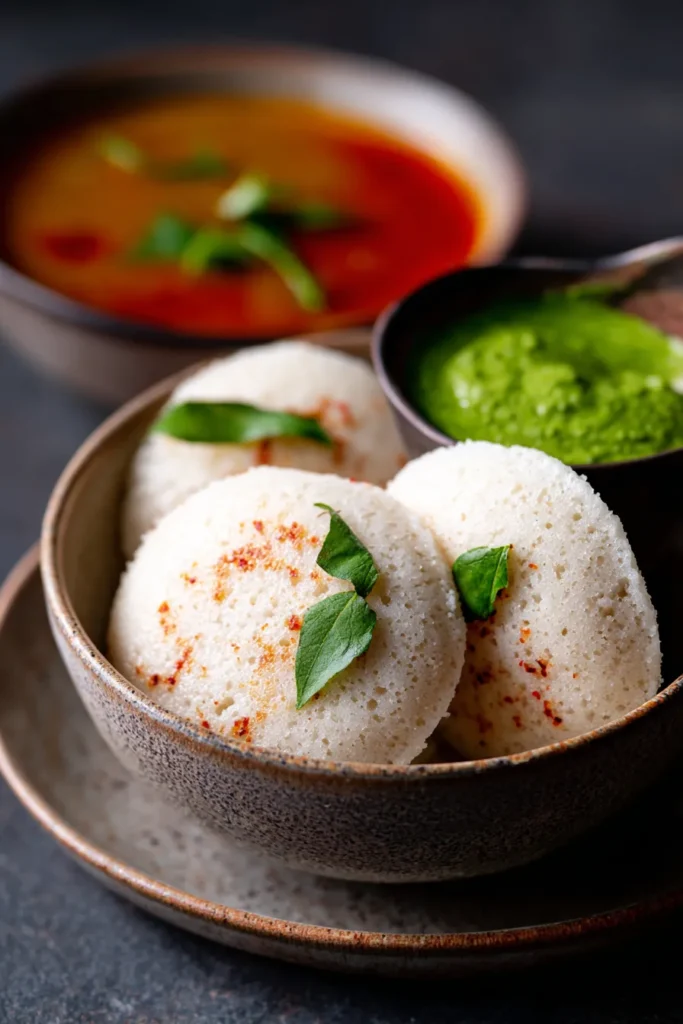
- Flavorful & Satisfying: Don’t let the “healthy” tag fool you – these ragi idlis are bursting with subtle, earthy flavors that are deeply satisfying. They pair beautifully with a simple coconut chutney or a vibrant sambar, offering a complete and wholesome meal. The slight nuttiness of the ragi adds a wonderful depth that regular rice idlis often lack, making them a delicious departure from the norm.
- Dietary Inclusive: Being naturally gluten-free (just ensure your other ingredients are GF too), these idlis cater to various dietary needs. They are also easily adaptable to be vegan-friendly by using a plant-based yogurt alternative and ensuring any tempering oil is vegan. This makes them a fantastic option for family meals where different dietary preferences need to be accommodated without extra fuss.
- Meal Prep Friendly: Cook a larger batch on the weekend, and you’ll have healthy breakfasts ready to go for several days! They store wonderfully in the refrigerator and reheat beautifully, retaining their soft texture. This makes them an ultimate win for meal planning, ensuring you never have to skip a healthy start, no matter how hectic your schedule gets.
- Kid-Approved Goodness: Sneaking healthy ingredients into kid-friendly meals can be a challenge, but these ragi idlis are often a hit! Their soft texture and mild flavor make them appealing to little ones. Serve them with a touch of ghee and their favorite dipping sauce, and watch them disappear. It’s a clever way to introduce nutritious millets into their diet without them even knowing!
- Budget-Conscious Choice: Ragi flour is generally an affordable and readily available ingredient, especially in Indian grocery stores. Making idlis at home is far more economical than buying pre-made breakfast options or frequenting cafes. It’s a healthy, delicious, and budget-friendly way to nourish your family.
What You Need
You only need a few simple pantry staples for this recipe! Ragi flour, semolina, yogurt, and a few basic spices come together to create magic. Check the full printable recipe card below for detailed measurements and a complete list of what you’ll need to create these healthy breakfast heroes.
Expert Tips
- The Power of Resting Time: While this is a “no-ferment” recipe, allowing the batter to rest for at least 15-20 minutes is key. This resting period allows the semolina (sooji) to properly hydrate and swell, which contributes significantly to the idlis’ soft and fluffy texture. Don’t skip this step! It makes all the difference in achieving that desired spongy bite.
- Greasing Idli Molds Properly: Before pouring the batter, lightly grease your idli molds with a neutral oil or ghee. This ensures the idlis release easily and cleanly once steamed. A light brush or a quick wipe with an oil-soaked paper towel is sufficient. Over-greasing can sometimes lead to an oily residue on the idlis.
- Water Level in the Steamer: Always make sure there’s enough water in your idli steamer (or pressure cooker without the whistle). The water should not touch the bottom of the idli plates. Too little water, and it might evaporate before your idlis are fully cooked. Too much, and it could boil over into your idlis. Maintain a steady simmer throughout the steaming process.
- Don’t Overfill the Molds: Fill each idli mold only about three-quarters full. The batter will expand as it steams, and overfilling will cause them to overflow and lose their classic dome shape. This also prevents them from sticking together, ensuring individual, perfectly formed idlis.
- Steaming Time is Critical: Stick to the recommended steaming time (usually 10-12 minutes for standard-sized idlis). Over-steaming can make the idlis tough and dry, while under-steaming will leave them sticky and gooey in the center. To check for doneness, insert a toothpick into an idli; it should come out clean.
- The Art of Resting After Steaming: Once steamed, resist the urge to immediately remove the idlis from the molds. Let them rest in the steamer for 2-3 minutes after turning off the heat. This allows them to firm up slightly, making them much easier to demold without tearing.
- Serving Temperature: Idlis are best enjoyed warm, straight from the steamer. The warmth enhances their softness and makes them melt-in-your-mouth delicious. If you’ve made them ahead, gently reheat them in a steamer or microwave with a splash of water for a few seconds until soft again.
- Tempering for Extra Flavor (Optional but Recommended!): While not strictly part of the “one-pot” batter creation, a quick tempering (tadka) of mustard seeds, curry leaves, and green chilies added to the batter just before steaming can elevate the flavor profile significantly. This adds a wonderful aromatic punch.
- Quality of Ragi Flour: Use fresh, good-quality ragi flour. Older flour can sometimes impart a slightly bitter taste. Store your ragi flour in an airtight container in a cool, dry place to maintain its freshness.
Variations & Substitutions
- Veggies: Finely grate carrots, zucchini, or finely chop spinach and add directly to the batter for a nutritional boost and a pop of color.
- Spice It Up: Add a pinch of red chili powder or finely chopped green chilies for more heat. Ginger-garlic paste can also be incorporated for an aromatic twist.
- Vegan Option: Simply swap out the regular yogurt for a plant-based alternative like unsweetened soy or almond yogurt. Ensure all other ingredients are plant-based.
- Gluten-Free: Ragi is naturally gluten-free. Ensure your semolina (sooji) is also certified gluten-free, or substitute it with rice flour or finely ground oats for similar binding properties.
- Herbs: Fresh coriander or mint leaves, finely chopped, can add a lovely freshness to the idlis.
- Protein Boost: For an extra protein kick, you can add a tablespoon of finely ground roasted peanuts or a small amount of crumbled paneer to the batter.
- Different Millets: While ragi is fantastic, you can experiment with other millet flours like jowar (sorghum) or bajra (pearl millet) for different nutritional profiles and tastes. Adjust water content as millet flours absorb liquids differently.
Storage & Freezing
- Refrigeration: Leftover ragi idlis can be stored in an airtight container in the refrigerator for up to 2-3 days.
- Reheating: To reheat, place them in an idli steamer for a few minutes until soft and warm, or microwave with a sprinkle of water until heated through.
- Freezing: For longer storage, allow the idlis to cool completely. Arrange them in a single layer on a baking sheet and freeze until solid. Then transfer them to a freezer-safe bag or container, separating layers with parchment paper. They can be frozen for up to 1 month.
- Thawing & Reheating from Frozen: Thaw frozen idlis overnight in the refrigerator or reheat directly from frozen in a steamer until soft and hot. This typically takes a bit longer than reheating refrigerated idlis.
FAQ
Q: Can I make the batter ahead of time?
A: Absolutely! You can prepare the batter and store it in an airtight container in the refrigerator for up to 1-2 days. Give it a good stir before steaming, and add a tiny splash of water if it has thickened too much.
Q: What should I serve with Ragi Idli?
A: Ragi idlis pair wonderfully with classic South Indian accompaniments! A simple coconut chutney, a tangy tomato chutney, or a flavorful sambar are all excellent choices. For a quick option, a spoonful of ghee or a sprinkle of idli podi works wonders.
Q: My idlis turned out hard. What went wrong?
A: Hard idlis are usually a sign of too little moisture in the batter, over-steaming, or not allowing the batter to rest. Ensure your batter isn’t too thick, steam only for the recommended time (check with a toothpick!), and let the semolina hydrate properly by resting the batter.
Conclusion
And there you have it – the secret to truly delicious, healthy, and incredibly easy One-Pot Ragi Idli! This recipe is more than just a breakfast; it’s a way to bring wholesome goodness and a little bit of South Indian sunshine into your busy mornings. Give it a try, and I promise you’ll be adding it to your regular rotation. Don’t forget to Pin this recipe for later and share your creations with me on social media! Happy cooking!
One-Pot Ragi Idli: Healthy, Easy Indian Breakfast Recipe
Ingredients
- 1 cup ragi flour
- 1/2 cup fine semolina (sooji)
- 1 cup plain yogurt
- 1/2 cup water (or more, as needed)
- 1/2 tsp salt
- 1/2 tsp baking soda
- 1 tbsp oil
- 1/2 tsp mustard seeds
- 5-6 curry leaves
- 1 green chili, finely chopped
Instructions
- Step 1 In a large bowl, combine ragi flour, semolina, yogurt, water, and salt. Mix well to form a smooth batter. Ensure no lumps.
- Step 2 Cover the bowl and let the batter rest for 15-20 minutes. This allows the semolina to absorb moisture and swell.
- Step 3 Heat oil in a small pan. Add mustard seeds and let them splutter. Add curry leaves and chopped green chili, sautu00e9 for a few seconds. Pour this tempering into the batter.
- Step 4 Add baking soda to the batter and mix gently until just combined. Do not overmix. The batter should be light and airy.
- Step 5 Grease idli molds with a little oil. Pour batter into each mold, filling them about 3/4 full.
- Step 6 Steam the idlis in a preheated steamer for 10-12 minutes on medium heat. A toothpick inserted should come out clean.
- Step 7 Turn off the heat and let the idlis rest in the steamer for 2-3 minutes. Carefully demold and serve hot with chutney or sambar.