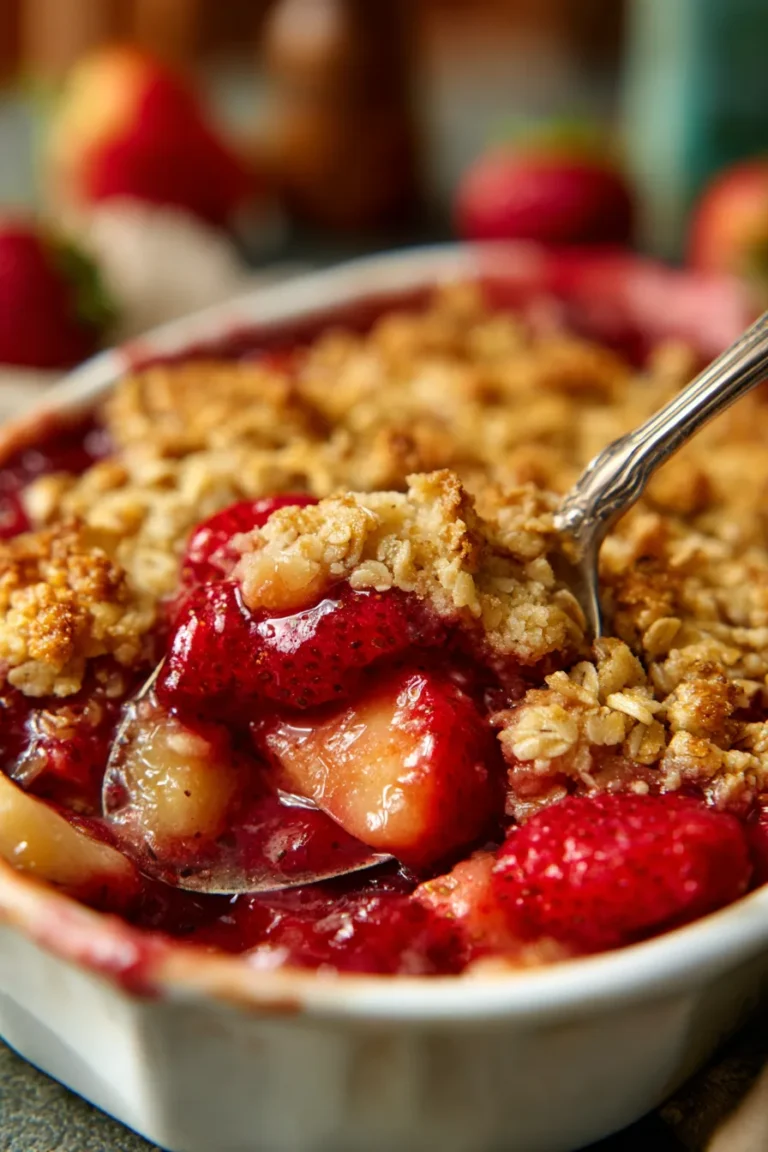
The Best Ever Strawberry Rhubarb Crisp Recipe
There are some desserts that just whisper “home” to me, and this classic Strawberry Rhubarb Crisp is definitely one of them. I can still picture my grandmother’s sprawling backyard, brimming with vibrant red rhubarb stalks and sweet, sun-kissed strawberries. Every spring, we’d spend hours picking them, our baskets overflowing with nature’s bounty, knowing what delicious treat awaited us.
That cherished memory is the heart behind this recipe. It’s not just a dessert; it’s a piece of my childhood, perfected over years to bring you the most delightful, easy-to-make crisp imaginable. This truly is the ultimate comfort food, blending tart rhubarb with sweet strawberries under a golden, crunchy topping that will have everyone asking for seconds.
Whether you’re celebrating the arrival of spring, need a simple yet impressive dessert for a gathering, or just crave that warm, fruity goodness, this tested family favorite Strawberry Rhubarb Crisp is the answer. It’s an easy dessert that always hits the spot, delivering pure, unadulterated joy with every single bite.
Why You’ll Love This Recipe
❤️ Here’s why this Strawberry Rhubarb Crisp will become your new favorite:
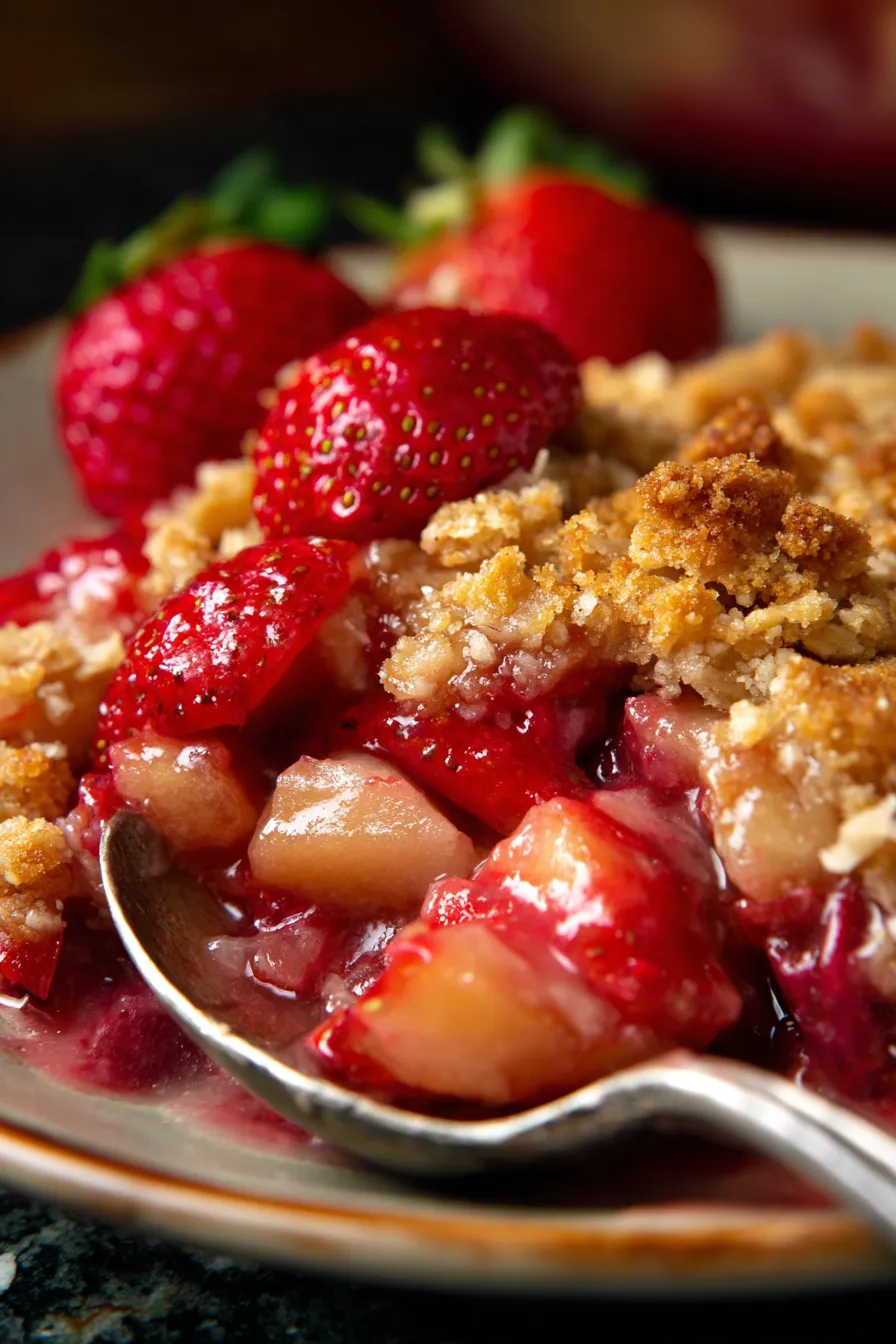
- Irresistible Flavor Combination: The timeless pairing of sweet strawberries and tangy rhubarb creates a perfectly balanced filling that’s both vibrant and comforting. It’s a classic for a reason!
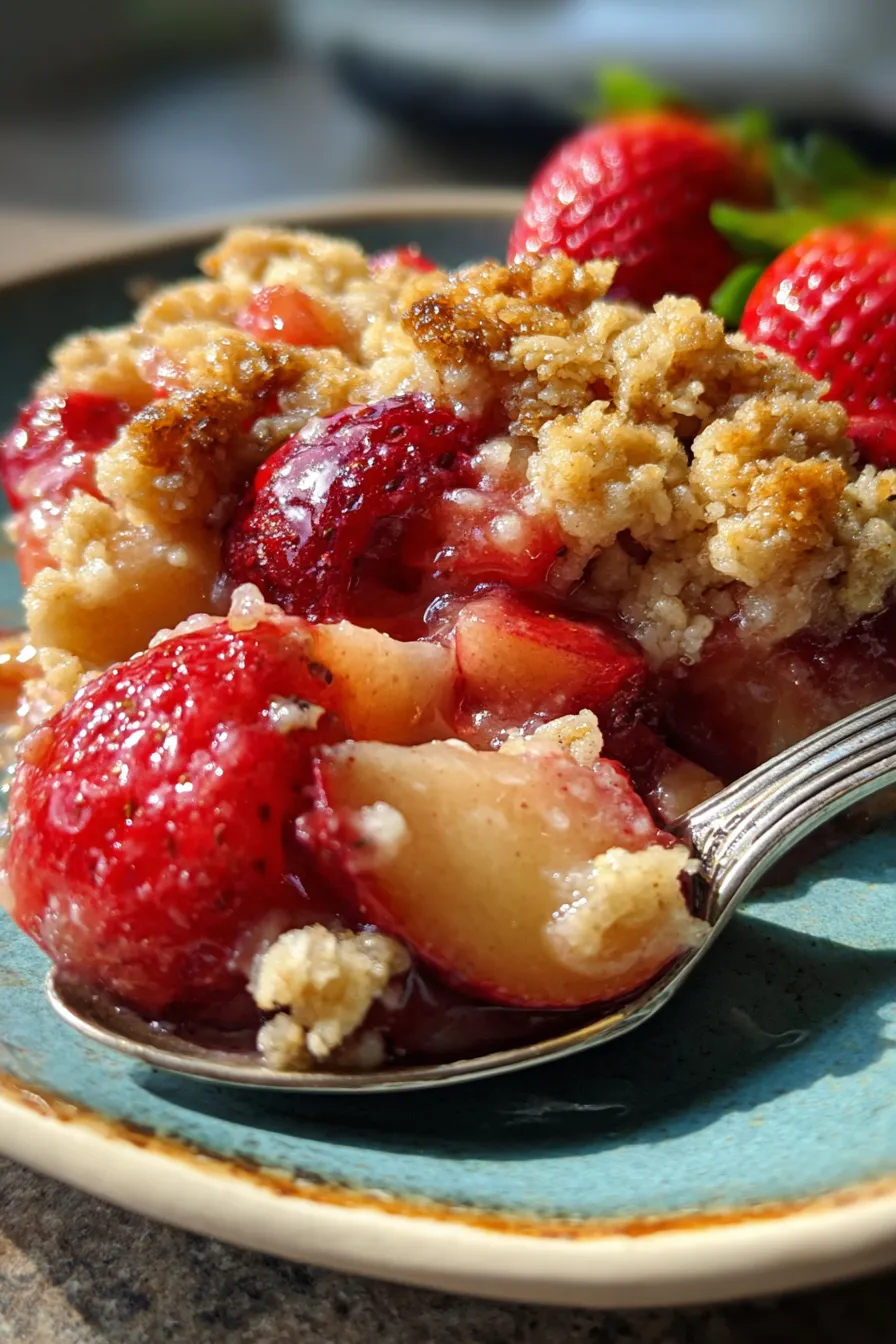
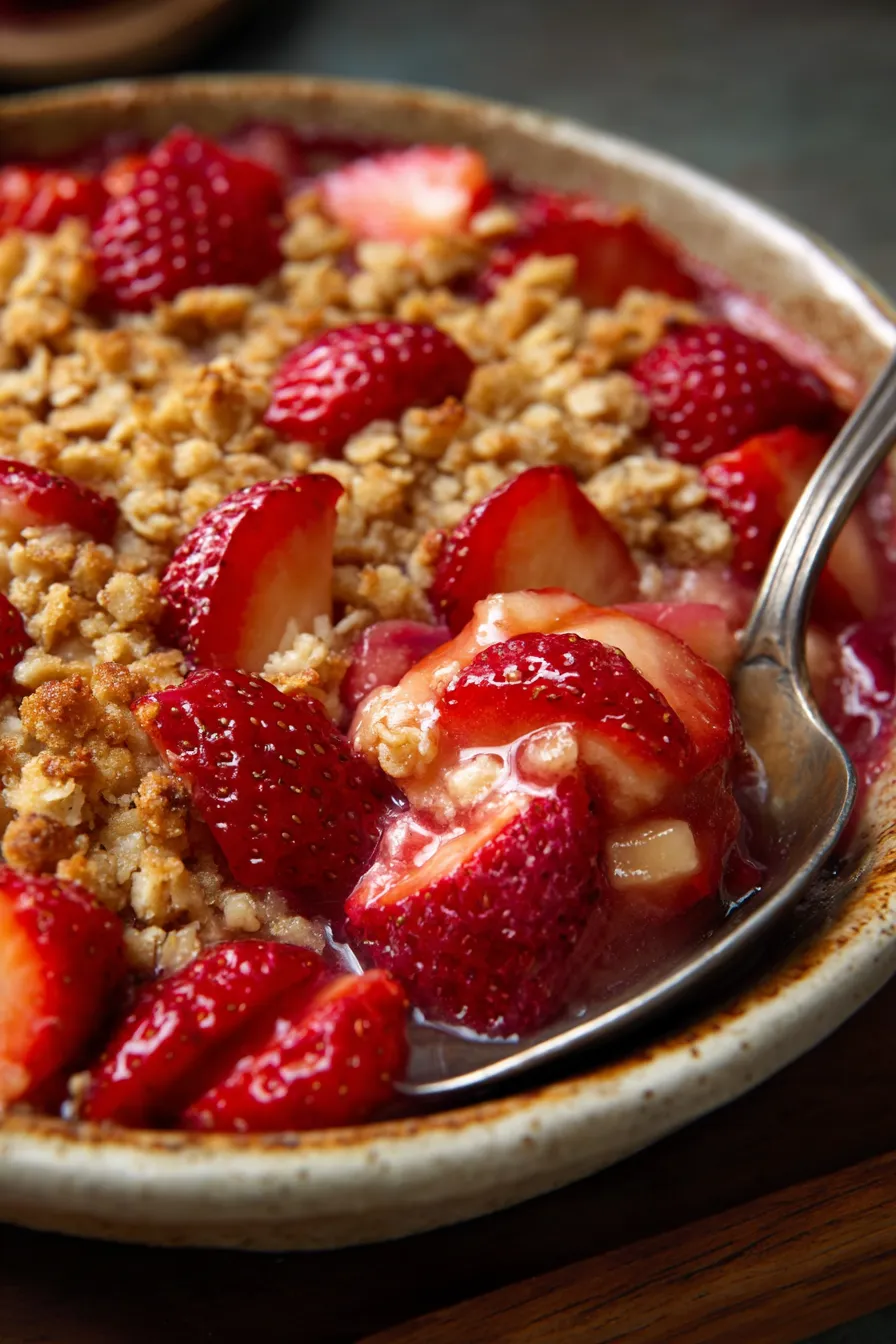
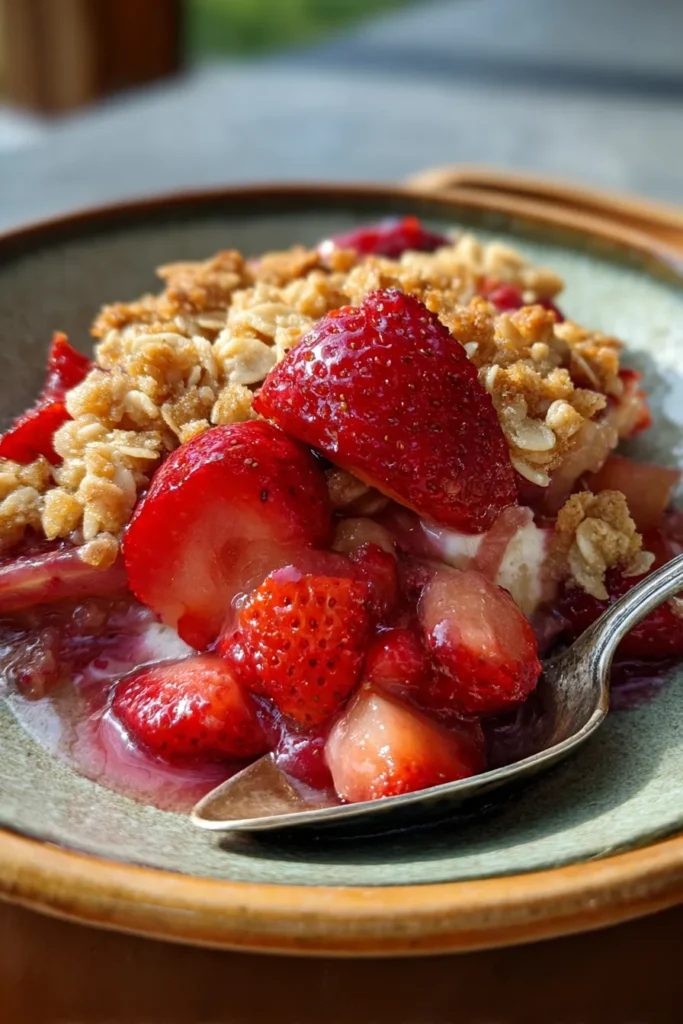
- Perfect Texture Contrast: Imagine digging into a spoonful that offers gooey, tender fruit on the bottom and a gloriously crisp, buttery, and slightly chewy oat topping on top. It’s a textural dream!
- Remarkably Easy to Make: Don’t let its impressive appearance fool you. This recipe comes together with minimal effort, using simple pantry staples. Even beginner bakers can master this dessert!
- Seasonal Superstar: It’s the ideal way to celebrate fresh spring and early summer produce. Using ripe, in-season strawberries and rhubarb guarantees the best flavor and aroma.
- Versatile & Customizable: Easily adapt it to your dietary needs (gluten-free, vegan options available!) or try adding other berries. It’s a flexible recipe that invites creativity.
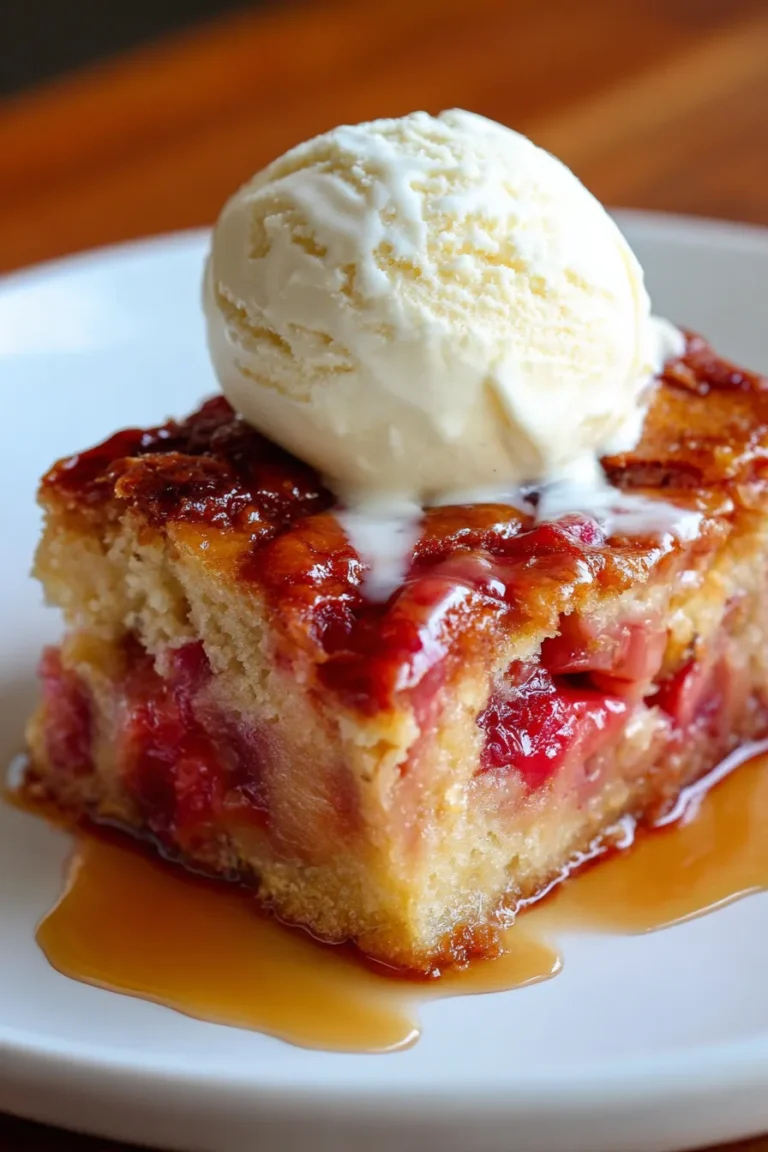
- Crowd-Pleaser: From casual weeknight desserts to special gatherings, this crisp consistently earns rave reviews. Serve it warm with a scoop of vanilla bean ice cream, and watch it disappear!
- Comfort in Every Bite: There’s something inherently cozy about a warm fruit crisp. It’s the ultimate edible hug, perfect for brightening any day or ending a meal on a high note.
What You Need
You only need a few simple pantry staples and fresh, vibrant produce for this recipe! The magic happens when these humble ingredients come together to create something truly extraordinary. Check the full printable recipe card below for detailed measurements of both the sweet-tart fruit filling and the irresistible buttery oat streusel topping.
Expert Tips
💡 Elevate your Strawberry Rhubarb Crisp with these pro tips:
- Choose Ripe Fruit: For the best flavor, select deeply colored, fragrant strawberries and firm, crisp rhubarb stalks. Avoid any wilted or mushy pieces. Ripe fruit needs less added sugar!
- Don’t Overmix the Topping: Mix the streusel topping just until everything is combined and crumbly. Overmixing can develop the gluten in the flour, leading to a tougher topping instead of a tender, crumbly one.
- Cut Rhubarb Evenly: Chop your rhubarb into ½-inch pieces. This ensures even cooking, so you don’t end up with some tough pieces and some overly mushy ones.
- Thicken with Care: The cornstarch in the filling is crucial for preventing a runny crisp. Ensure it’s well mixed with the fruit. If you prefer a thicker filling, you can add an extra half tablespoon of cornstarch.
- Golden Brown is Key: Bake until the topping is deeply golden brown and the fruit filling is visibly bubbling around the edges. This bubbling indicates the fruit is tender and the filling has thickened properly.
- Cool Before Serving (Slightly): While delicious hot, letting the crisp cool for at least 15-20 minutes allows the filling to set up further, preventing it from being too soupy.
- Serve Warm: Crisps are always best served warm! Reheat individual portions briefly in the microwave or a low oven if making ahead.
- Add a Pinch of Spice: A tiny pinch of ground ginger or cardamom can beautifully complement the strawberry and rhubarb flavors, adding an extra layer of warmth and complexity to your crisp.
- Butter Temperature for Topping: Ensure your butter for the topping is cold and cut into small pieces. This helps create that desirable crumbly, crisp texture as it melts slowly during baking.
- Don’t Peel Rhubarb: Unlike some vegetables, rhubarb does not need to be peeled. The skin cooks down nicely and adds to the vibrant color of the filling.
Variations & Substitutions
This Strawberry Rhubarb Crisp recipe is wonderfully adaptable! Here are some ideas to customize it:
- Gluten-Free: Simply substitute the all-purpose flour in both the filling and the topping with a 1:1 gluten-free baking flour blend (ensure it contains xanthan gum). Use certified gluten-free oats.
- Vegan: Replace the butter in the topping with a good quality plant-based butter alternative. Ensure your oats are certified vegan.
- Mixed Berry Delight: Can’t get enough berries? Substitute some of the strawberries with blueberries, raspberries, or blackberries for a different fruity twist.
- Nutty Topping: Add a quarter cup of chopped pecans, walnuts, or sliced almonds to the streusel topping for extra crunch and flavor.
- Spice It Up: Enhance the warm notes by adding a pinch of nutmeg or a tiny amount of ground ginger to the fruit filling alongside the cinnamon.
- Less Sweet: If your fruit is particularly ripe and sweet, or if you prefer a less sweet dessert, you can reduce the sugar in the fruit filling by 1/4 cup.
- Citrus Zest: For an extra bright flavor, add a teaspoon of orange zest to the fruit filling along with the lemon juice.
Storage & Freezing
Proper storage ensures your crisp stays delicious for longer!
- Countertop: Leftover crisp can be stored, loosely covered with foil or plastic wrap, at room temperature for up to 2 days.
- Refrigerator: For longer storage, transfer the crisp to an airtight container or cover the baking dish tightly and refrigerate for up to 4-5 days.
- Freezing (Baked): Once completely cooled, you can freeze the crisp. Wrap the entire crisp (in its baking dish) tightly with plastic wrap and then foil, or scoop individual portions into freezer-safe containers. It will keep for up to 3 months. Thaw in the refrigerator overnight and reheat in a 350°F (175°C) oven until warmed through and bubbly.
- Freezing (Unbaked): You can also prepare the crisp up to the point of baking. Cover tightly and freeze for up to 1 month. When ready to bake, add 10-15 minutes to the baking time, or thaw in the fridge first.
FAQ
Q: Why is my crisp topping not crispy?
A: A common reason is too much moisture in the topping or not baking long enough. Ensure your butter is cold and try to avoid overmixing. Also, make sure the crisp bakes until golden brown and firm.
Q: My fruit filling is too runny. What went wrong?
A: This usually means the fruit hasn’t cooked long enough or there wasn’t enough cornstarch (or other thickener). Ensure the crisp is bubbling vigorously around the edges when you pull it from the oven, which indicates the filling has thickened properly. You can add a bit more cornstarch if you prefer a thicker consistency.
Q: Can I make this crisp ahead of time?
A: Yes! You can assemble the crisp completely, cover it, and refrigerate it for up to 24 hours before baking. You might need to add an extra 5-10 minutes to the baking time if baking from cold. You can also bake it completely, cool, and then gently reheat before serving.
Q: What’s the best way to serve Strawberry Rhubarb Crisp?
A: Warm, straight from the oven, is always best! A scoop of good quality vanilla bean ice cream or a dollop of freshly whipped cream is the perfect accompaniment, adding a creamy contrast to the warm, fruity goodness.
This Strawberry Rhubarb Crisp isn’t just a dessert; it’s an experience. It’s the taste of spring, the warmth of home, and the pure joy of simple, delicious baking. I truly hope it brings as much happiness to your table as it does to mine. Don’t forget to pin this recipe for later and share your crisp creations with me!
Happy baking, friends!
Best Ever Strawberry Rhubarb Crisp – A Perfect Spring Dessert
Ingredients
- For the Filling:
- 4 cups chopped rhubarb (about 1 lb)
- 4 cups sliced fresh strawberries (about 1.5 lbs)
- 3/4 cup granulated sugar (adjust to taste)
- 1/4 cup all-purpose flour
- 1 tablespoon lemon juice
- 1 teaspoon vanilla extract
- 1/2 teaspoon ground cinnamon
- For the Topping:
- 1 cup all-purpose flour
- 1/2 cup old-fashioned rolled oats
- 1/2 cup packed light brown sugar
- 1/4 cup granulated sugar
- 1/2 teaspoon ground cinnamon
- 1/4 teaspoon salt
- 1/2 cup (1 stick) unsalted butter, cold and cut into cubes
Instructions
- Step 1 Preheat Oven & Prepare Dish: Preheat your oven to 375°F (190°C). Lightly grease a 9x13 inch baking dish.
- Step 2 Make the Filling: In a large bowl, gently combine the chopped rhubarb, sliced strawberries, granulated sugar, all-purpose flour, lemon juice, vanilla extract, and cinnamon. Toss until the fruit is evenly coated. Pour the fruit mixture into the prepared baking dish.
- Step 3 Prepare the Topping: In a separate medium bowl, whisk together the all-purpose flour, rolled oats, brown sugar, granulated sugar, cinnamon, and salt. Add the cold, cubed butter. Using your fingertips, a pastry blender, or a fork, cut the butter into the dry ingredients until the mixture resembles coarse crumbs with some pea-sized pieces of butter remaining.
- Step 4 Assemble & Bake: Sprinkle the oat topping evenly over the fruit filling in the baking dish. Place the dish on a baking sheet (to catch any potential drips) and bake for 40-50 minutes, or until the topping is golden brown and the fruit filling is bubbly and tender. If the topping starts to brown too quickly, you can loosely tent it with foil.
- Step 5 Cool & Serve: Remove the crisp from the oven and let it cool for at least 15-20 minutes before serving. This allows the fruit filling to set up nicely. Serve warm, ideally with a scoop of vanilla ice cream or a dollop of whipped cream.