Fluffy & Flavorful Quick Besan Chilla: Your Go-To Indian Breakfast Recipe!
Oh, those busy mornings! We’ve all been there, staring into the fridge, wishing for something quick, healthy, and incredibly satisfying to magically appear. For me, that wish often comes true in the form of this delightful Quick Besan Chilla | Breakfast Recipes Indian. It’s a lifesaver on chaotic weekdays and a cherished treat on leisurely weekends. My grandmother, a true culinary wizard, always said that a good meal sets the tone for the entire day. And honestly, a plate of these savory, protein-packed chillas does just that!
I remember one rainy Saturday, with a house full of hungry cousins, when I first truly appreciated the power of Besan Chilla. I whipped up a giant batch, loaded with fresh veggies and aromatic spices, and watched as everyone devoured them with huge smiles. It was an instant hit, transforming a potentially stressful morning into a cozy, memorable brunch. Since then, this recipe has become a tried-and-true family favorite, always guaranteeing a nourishing and delicious start to any day.
This isn’t just any breakfast; it’s a wholesome, easy breakfast solution that brings incredible flavor and a boost of protein, making it perfect for anyone looking for healthy Indian breakfast options. Get ready to fall in love with these savory chickpea flour pancakes!
Why You’ll Love This Recipe
- Lightning Fast & Effortless: Seriously, this recipe comes together in under 30 minutes! It’s the perfect solution for those busy mornings when you need something nutritious on the table without fuss. No complicated steps, just whisk and cook!
- Healthy & Wholesome: Made with besan (chickpea flour), these chillas are naturally gluten-free and packed with plant-based protein and fiber. Add in a handful of fresh vegetables, and you’ve got a power-packed breakfast that keeps you full and energized for hours.
- Incredibly Versatile: Think of this recipe as a blank canvas! You can customize it with your favorite vegetables, adjust the spice levels, and even add grated paneer or tofu for an extra protein punch. It’s fantastic for using up those leftover veggies in your fridge.
- Naturally Gluten-Free & Vegan-Friendly: Since besan is made from chickpeas, it’s naturally gluten-free, making it a wonderful option for those with dietary restrictions. And by using oil instead of ghee, it easily becomes a delicious vegan meal!
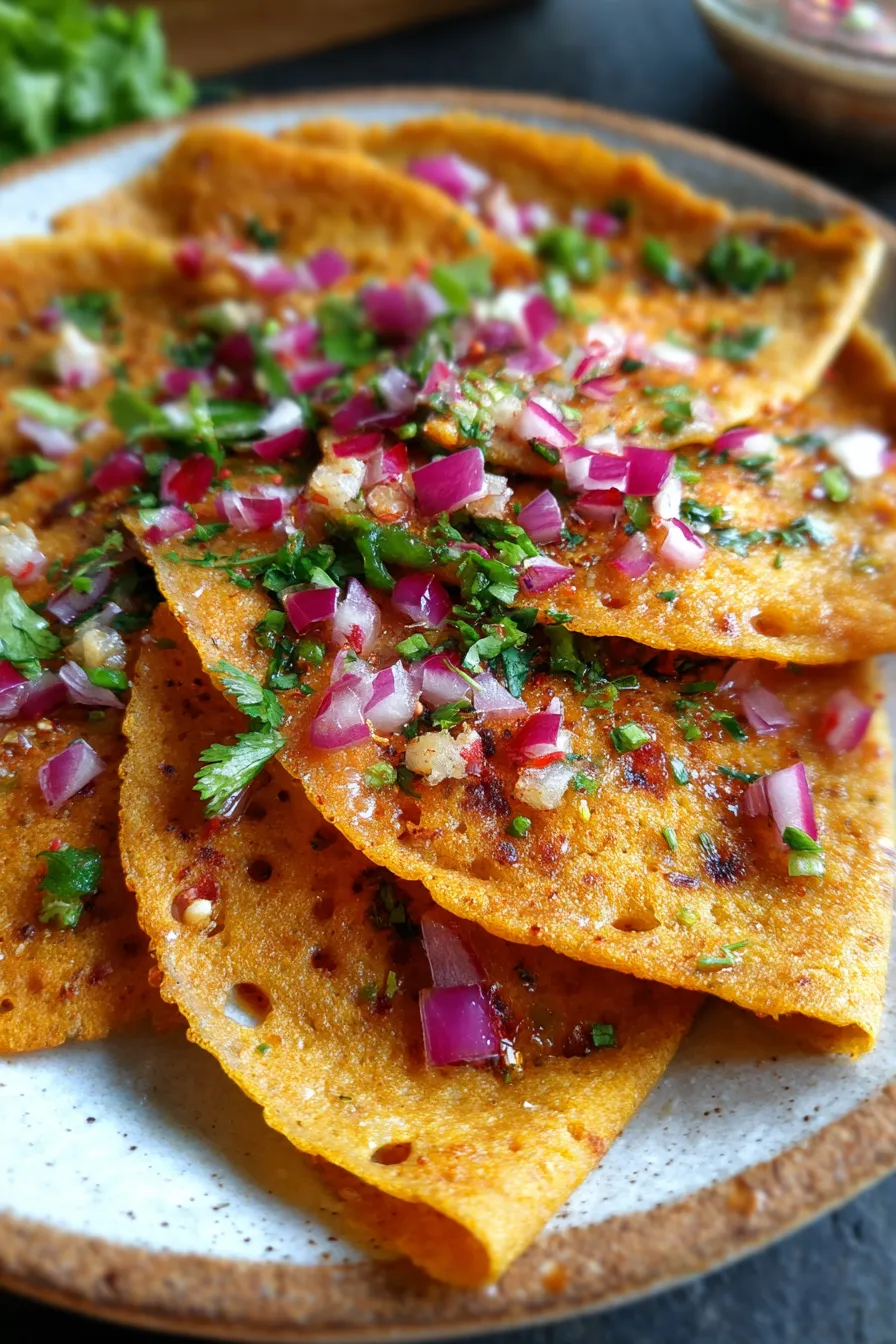
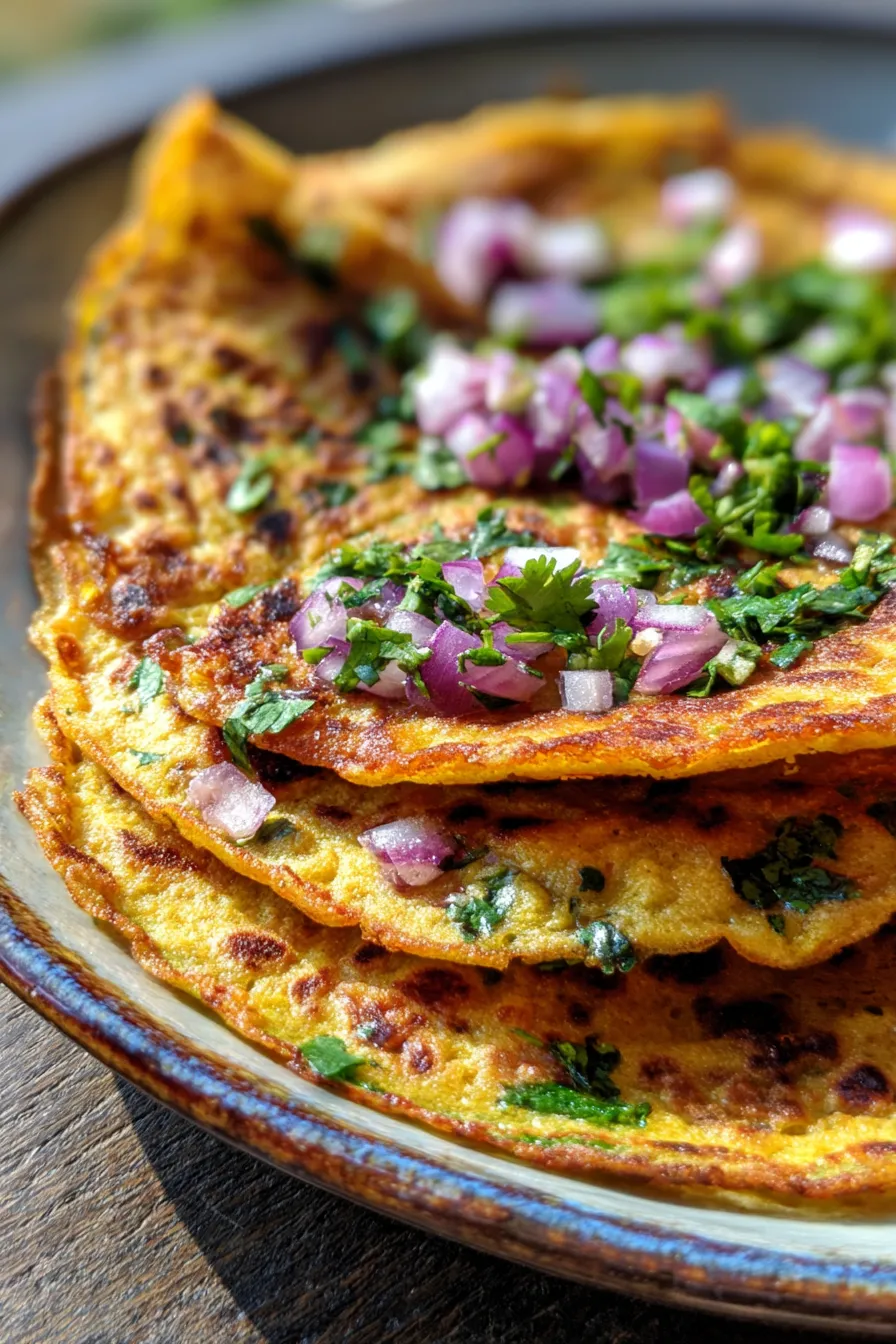
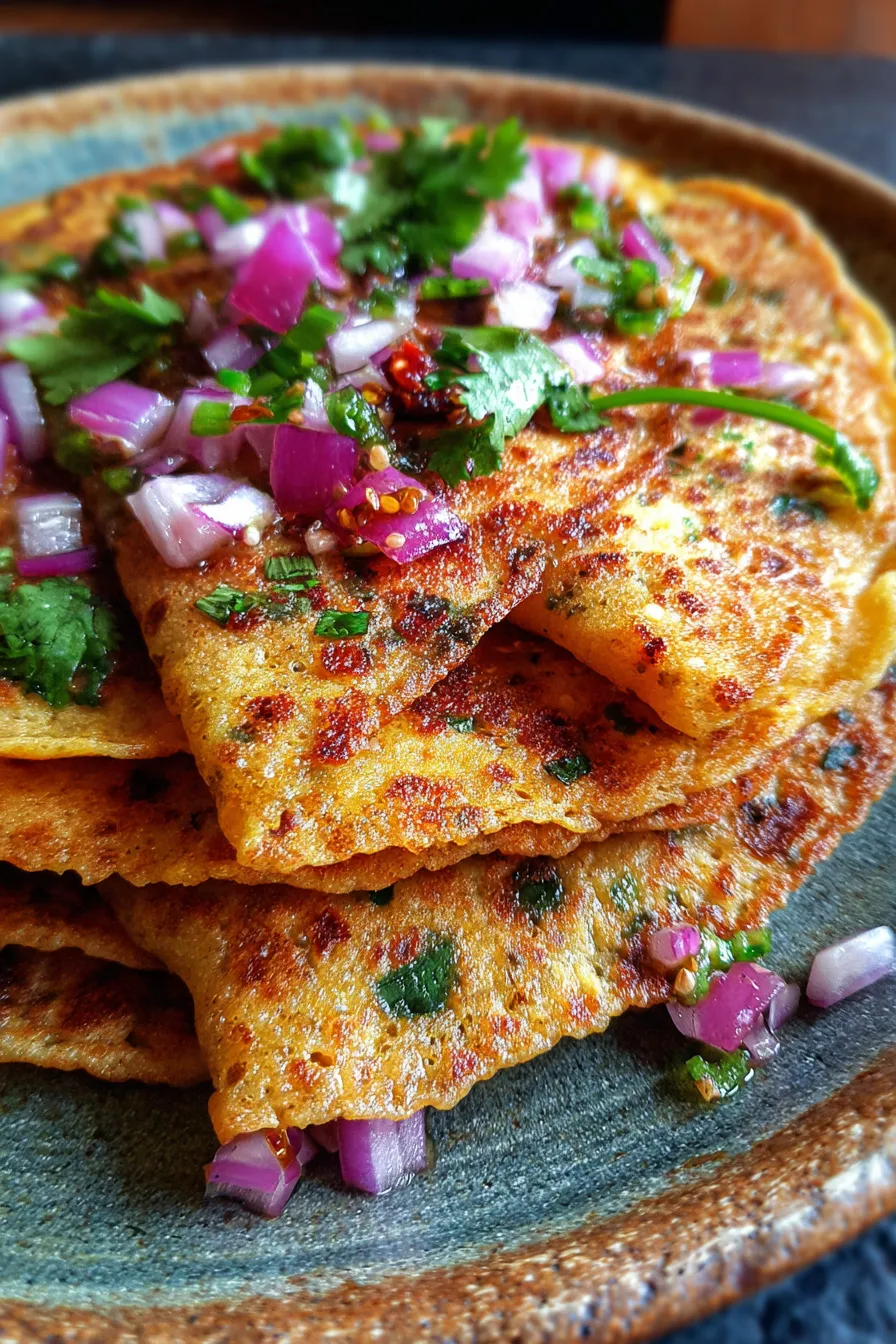
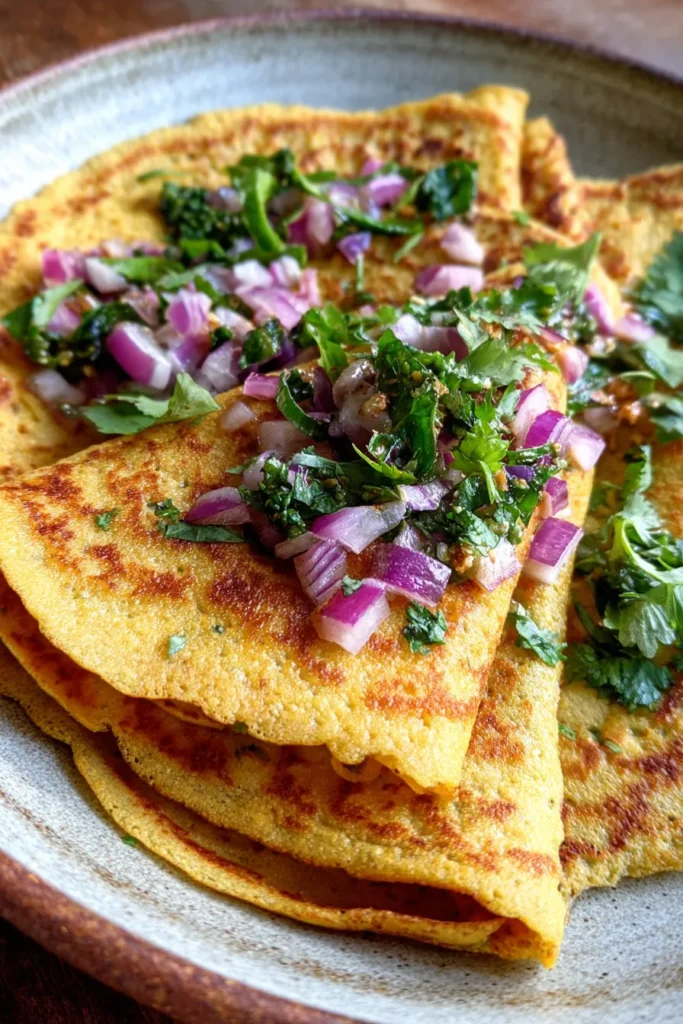
- Delicious Flavor & Texture: Each chilla offers a delightful balance of savory spices, fresh herbs, and a subtle tang. They’re wonderfully soft and fluffy on the inside, with perfectly crispy, golden-brown edges. It’s truly a treat for your taste buds!
- Kid-Friendly Approved: My own kids, and many others I know, absolutely adore these! They’re mild enough for sensitive palates but flavorful enough to be exciting. You can even cut them into fun shapes for an extra touch.
- Budget-Friendly: Chickpea flour and common vegetables are inexpensive pantry staples. This recipe is a fantastic way to enjoy a delicious, healthy meal without breaking the bank.
- Meal Prep Dream: Prepare the batter a day ahead or cook a batch of chillas to reheat later in the week. They store beautifully and make for excellent grab-and-go meals or snacks.
What You Need
You only need a few simple pantry staples for this recipe! Check the full printable recipe card below for detailed measurements of besan, finely chopped vegetables like onion and tomato, fresh ginger and green chilies, a handful of aromatic spices, water, and a touch of oil or ghee for cooking.
Expert Tips for Perfect Besan Chilla
- Achieve a Smooth, Lump-Free Batter: The key to a silky chilla is a smooth batter. Start by whisking the besan with a small amount of water to form a thick paste, then gradually add the remaining water while continuously whisking. This prevents lumps effectively. You can also use a fine-mesh sieve to strain the batter for extra smoothness.
- Rest Your Batter: Don’t skip this step! Let the batter rest for at least 10-15 minutes (or up to an hour if you have time). This allows the chickpea flour to fully hydrate, resulting in softer, more pliable chillas that are less likely to break when cooking.
- Perfect Batter Consistency: Your batter should be thick enough to coat the back of a spoon but still easily pourable, similar to pancake batter. If it’s too thick, the chillas will be dense; too thin, and they’ll be hard to flip and might be too fragile. Adjust with a tablespoon of water or besan as needed.
- Preheat Your Pan Properly: A medium-hot non-stick pan or griddle is crucial. If the pan isn’t hot enough, the chilla will stick. If it’s too hot, it will burn quickly before cooking through. Test by sprinkling a few drops of water; they should sizzle and evaporate immediately.
- Oil or Ghee for Crispiness: Don’t be shy with a little oil or ghee around the edges and on top once the chilla starts to cook. This helps achieve those coveted crispy edges and a beautiful golden-brown color. Ghee adds an incredible aroma!
- Spreading Technique: Pour a ladleful of batter into the center of the hot pan. Immediately, using the back of the ladle, gently spread the batter outwards in a circular motion to form an even, thin pancake. Work quickly before the batter sets.
- The Art of Flipping: Wait until the edges start to lift and the top surface looks mostly dry with tiny bubbles forming. Gently slide a flat spatula underneath the chilla, ensuring it’s completely loose before confidently flipping it over. Patience is key here!
- Don’t Overcrowd the Pan: Cook chillas one at a time to maintain consistent heat and ensure even cooking. If you use a larger griddle, ensure there’s enough space between them.
- Fresh Herbs are a Must: Fresh cilantro (coriander leaves) adds an undeniable freshness and aroma that truly elevates the flavor profile of your chilla. Don’t skimp on it!
- Spice Adjustment: Feel free to adjust the green chili and red chili powder based on your heat preference. For a milder version, omit the green chilies entirely. For an extra kick, add a pinch more!
Variations & Substitutions
One of the best things about Quick Besan Chilla is how adaptable it is! Feel free to get creative and make it your own:
- Veggie Power-Up: Add finely grated carrots, zucchini, spinach, bell peppers, corn kernels, or even finely chopped fenugreek leaves (methi) to the batter for extra nutrition and flavor.
- Protein Boost: Mix in a couple of tablespoons of crumbled paneer (Indian cottage cheese), grated tofu, or even some finely chopped boiled chickpeas for an added protein punch.
- Spice It Up (or Down): Adjust the amount of green chilies, red chili powder, and ginger according to your taste. A pinch of black pepper or a dash of garam masala can also add a delightful twist.
- Tangy Twist: For a slight tang, add a teaspoon of lemon juice or a pinch of amchur (dry mango powder) to the batter.
- Herbal Infusion: Experiment with other fresh herbs like mint or curry leaves, finely chopped, for a different aromatic profile.
- Naturally Vegan & Gluten-Free: This recipe is inherently gluten-free. To keep it vegan, simply use oil (like vegetable, canola, or sunflower oil) instead of ghee for cooking.
Storage & Freezing
- Storing Cooked Chillas: Allow cooked Besan Chillas to cool completely. Stack them with a piece of parchment paper between each to prevent sticking. Store in an airtight container in the refrigerator for up to 2-3 days.
- Reheating: Gently reheat chillas on a warm non-stick pan for a few minutes on each side until heated through and slightly crispy again. You can also microwave them for 30-60 seconds, though they might lose some crispiness.
- Freezing: Cooked and cooled chillas can be frozen. Place parchment paper between each chilla, then wrap the stack tightly in plastic wrap and foil, or store in a freezer-safe bag. They will keep for up to 1 month. Thaw in the refrigerator overnight and reheat as directed above.
- Batter Storage: The prepared batter can be stored in an airtight container in the refrigerator for up to 24 hours. Give it a good whisk before cooking, as it might thicken slightly.
FAQ
Q: What exactly is Besan Chilla?
A: Besan Chilla, also known as Besan Cheela or Pudla, is a savory Indian pancake or crepe made from besan (chickpea flour), mixed with water, finely chopped vegetables (like onion, tomato, and chilies), and various spices. It’s a popular, protein-rich breakfast or snack throughout India.
Q: Can I prepare the Besan Chilla batter ahead of time?
A: Absolutely! Preparing the batter a few hours or even a day in advance is a fantastic time-saver. Store it in an airtight container in the refrigerator. Just give it a good whisk and check the consistency before cooking, adding a tablespoon or two of water if it has thickened too much.
Q: How do I make my Besan Chillas crispy?
A: For extra crispy chillas, ensure your pan is adequately hot, spread the batter thinly, and don’t skimp on the oil or ghee around the edges as it cooks. Let it cook undisturbed on each side until golden brown and crisp, resisting the urge to flip too soon.
Q: What should I serve with Besan Chilla?
A: Besan Chilla is incredibly versatile! It pairs beautifully with a simple green chutney, tamarind chutney, ketchup, a dollop of plain yogurt, or even a side of Indian pickles. For a more complete meal, serve it alongside a fresh salad or a cup of hot chai.
There you have it – your new favorite way to kickstart your day! This Quick Besan Chilla recipe is truly a gem, offering a perfect blend of health, flavor, and convenience. I hope it brings as much joy and deliciousness to your table as it does to mine. Don’t forget to pin this recipe for later and share your creations!
Quick Besan Chilla: Easy, Healthy Indian Breakfast Recipe!
Ingredients
- 1 cup besan (chickpea flour)
- 1/2 cup finely chopped onion
- 1/4 cup finely chopped tomato
- 1-2 green chilies, finely chopped (adjust to taste)
- 1 inch ginger, grated
- 1/4 cup fresh cilantro, chopped
- 1/2 tsp turmeric powder
- 1/2 tsp red chili powder (optional)
- 1/4 tsp asafoetida (hing)
- Salt to taste
- Approx. 1 - 1.5 cups water (as needed for batter consistency)
- Oil or ghee for cooking
Instructions
- Step 1 In a large mixing bowl, combine besan, chopped onion, tomato, green chilies, grated ginger, cilantro, turmeric powder, red chili powder, asafoetida, and salt.
- Step 2 Gradually add water, whisking continuously to form a smooth, lump-free batter. The consistency should be similar to pancake batter, thick enough to coat a spoon but pourable.
- Step 3 Let the batter rest for at least 10-15 minutes. This helps the flour hydrate properly and makes the chillas softer.
- Step 4 Heat a non-stick pan or griddle over medium heat. Lightly grease it with a few drops of oil or ghee.
- Step 5 Once hot, pour a ladleful of batter onto the center of the pan. Using the back of the ladle, gently spread the batter outwards in a circular motion to form an even, thin pancake (about 6-7 inches in diameter).
- Step 6 Drizzle a little oil or ghee around the edges and over the top of the chilla.
- Step 7 Cook for 2-3 minutes on one side until the edges start to lift and the top surface looks dry and lightly set.
- Step 8 Carefully flip the chilla and cook for another 2-3 minutes on the other side until golden brown and cooked through.
- Step 9 Remove from the pan and repeat with the remaining batter. Serve hot with green chutney, ketchup, or yogurt.