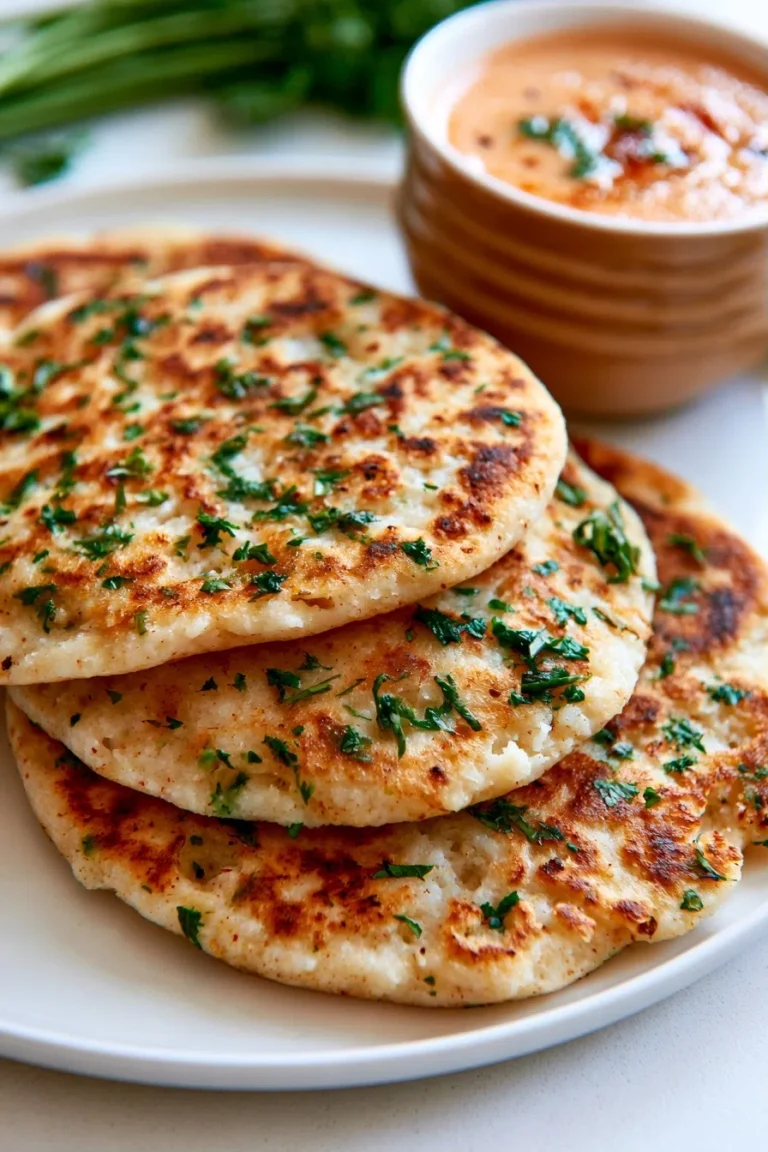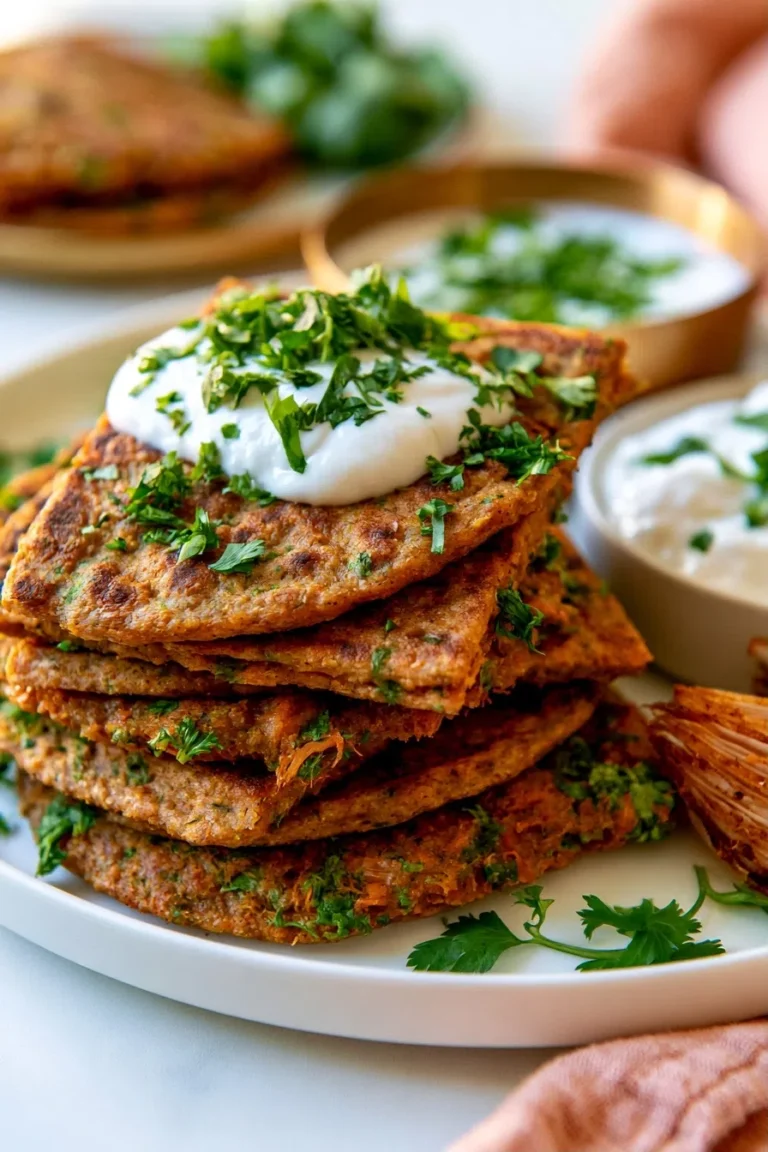
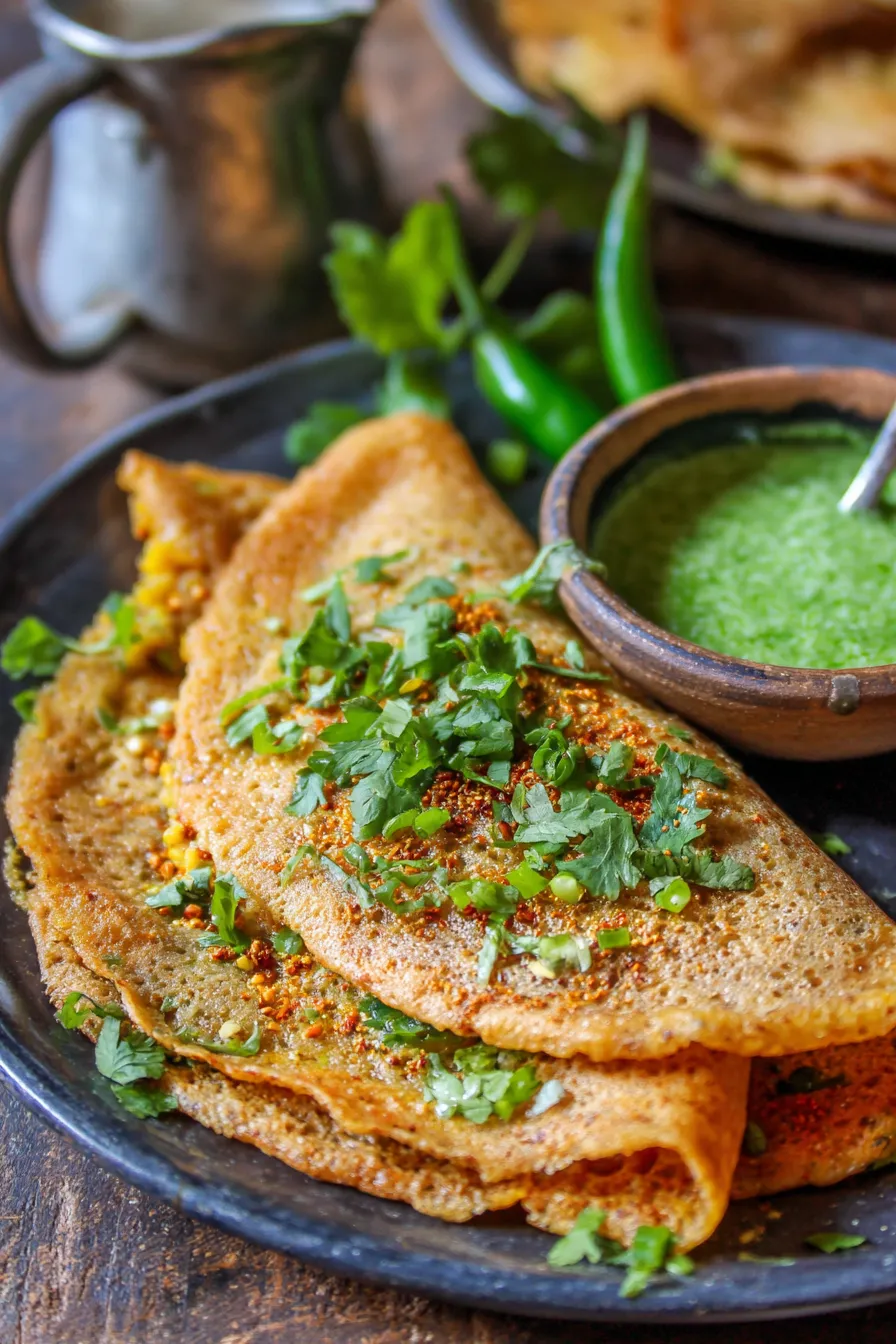
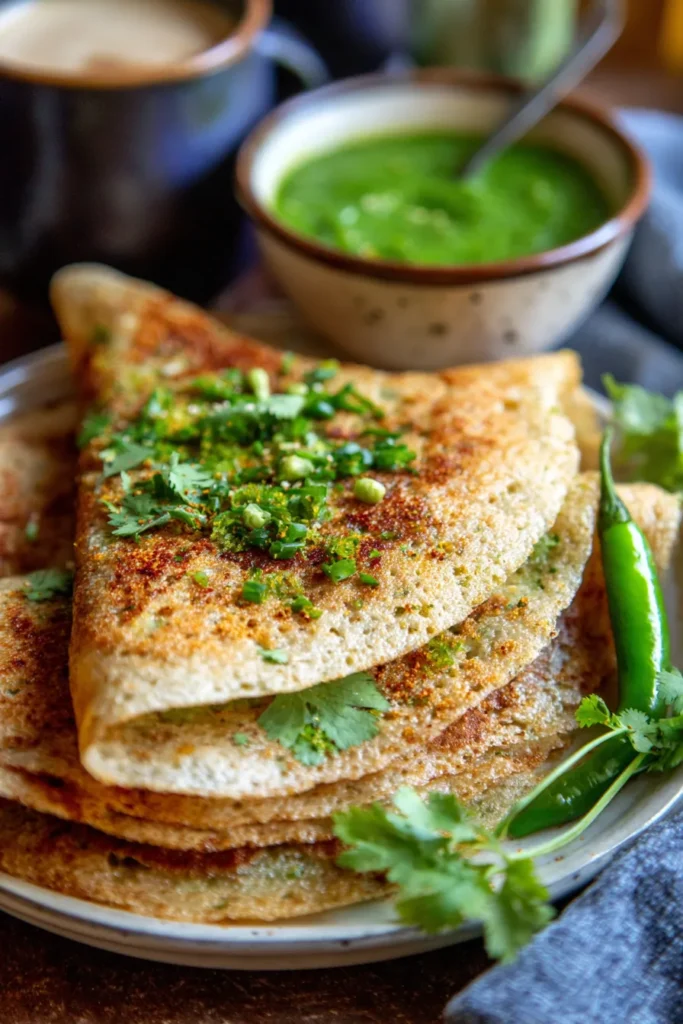
Fluffy & Flavorful Vegan Moong Dal Chilla: Your New Favorite Healthy Indian Breakfast!
I remember rainy Sunday mornings at my grandma’s house, the air filled with the comforting aroma of spices and lentil crepes sizzling on the griddle. She’d always make a batch of these savory Indian pancakes, and they were the highlight of our weekend. It was more than just breakfast; it was a warm hug in food form. That cherished memory is what inspired me to perfect this Vegan Moong Dal Chilla Indian Recipes | Healthy Breakfast – a plant-based twist on a beloved classic.
Now, I’m thrilled to share my tried-and-tested recipe with you. This isn’t just a recipe; it’s an invitation to recreate those cozy, delicious moments right in your own kitchen. Whether you’re a seasoned chef or new to Indian cuisine, this recipe is incredibly easy to follow and guarantees a wholesome meal that everyone will adore.
This vibrant, protein-packed chilla is a fantastic option for a healthy breakfast, a light lunch, or even a quick weeknight dinner. It’s a testament to simple, nourishing ingredients coming together to create something truly magical. Get ready to fall in love with your new favorite gluten-free and vegan delight!
Why You’ll Love This Recipe
❤️ Here’s why these delightful Moong Dal Chillas will become a staple in your kitchen:
- Protein Powerhouse: Made from split yellow moong dal, these chillas are packed with plant-based protein, keeping you full and energized throughout the morning. Say goodbye to mid-morning slumps and hello to sustained energy!
- Naturally Vegan & Gluten-Free: Perfect for those with dietary restrictions or anyone looking to incorporate more plant-based meals into their routine. Enjoy incredible flavor without any compromises.
- Quick & Easy: With minimal prep and cook time, you can whip up a batch of these savory pancakes even on busy weekdays. They’re much simpler to make than you might think, making them ideal for quick meals.
- Customizable Flavor: A versatile base allows you to adjust the spices and add your favorite veggies. Make it mild or spicy, load it with herbs, or keep it simple – the choice is entirely yours!
- Super Healthy: Low in fat, high in fiber, and bursting with nutrients, this is a breakfast that truly nourishes your body from the inside out. Feel good about what you’re eating every single day.
- Authentic Indian Taste: Experience the rich, aromatic flavors of traditional Indian cooking in a wholesome and accessible way. It tastes just like grandma used to make, but with a wonderful vegan twist!
- Kid-Friendly: A delicious way to sneak in some extra protein and vegetables for even the pickiest eaters. Kids will adore the soft, savory texture and vibrant flavors.
What You Need
You only need a few simple pantry staples for this recipe! The beauty of Moong Dal Chilla lies in its humble yet powerful ingredients, transforming everyday lentils into something extraordinary. Check the full printable recipe card below for detailed measurements and a complete list of what you’ll need.
Expert Tips
💡 Follow these expert tips for the fluffiest, most flavorful Moong Dal Chillas every time:
- Soak Your Dal Properly: Soaking the moong dal for at least 4-6 hours (or overnight) is crucial for achieving a super smooth batter and aiding in better digestion. Don’t rush this essential step for the best results!
- Perfect Batter Consistency: The batter should be thick yet pourable, much like traditional pancake batter. If it’s too thick, add a tablespoon of water at a time until you reach your desired, spreadable consistency.
- Non-Stick Pan is Key: Always use a well-seasoned non-stick pan or a cast-iron griddle. This prevents sticking, ensures even cooking, and helps achieve that beautiful golden-brown crust we all love.
- Medium Heat is Best: Cook the chillas over medium heat. If the heat is too high, they’ll burn on the outside before cooking through. Too low, and they might become tough and chewy instead of soft and fluffy.
- Spread Evenly: Pour a ladleful of batter onto the hot pan and gently spread it in a circular motion with the back of the ladle to form a thin, even chilla. Practice makes perfect, so don’t worry if your first one isn’t perfectly round!
- Don’t Overcrowd the Pan: Cook one or two chillas at a time, depending on the size of your pan. Overcrowding can lower the pan temperature, leading to uneven cooking and less desirable texture.
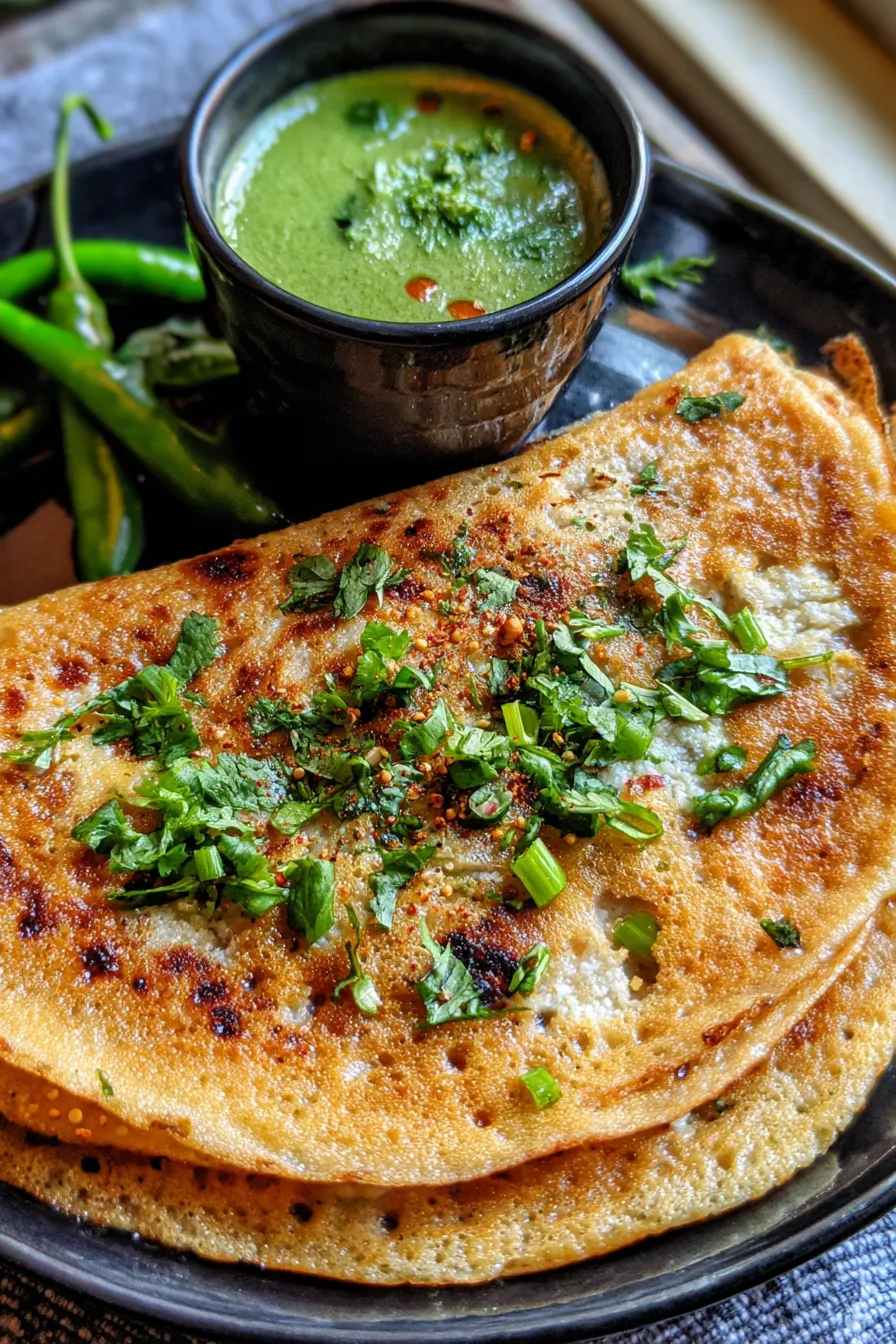
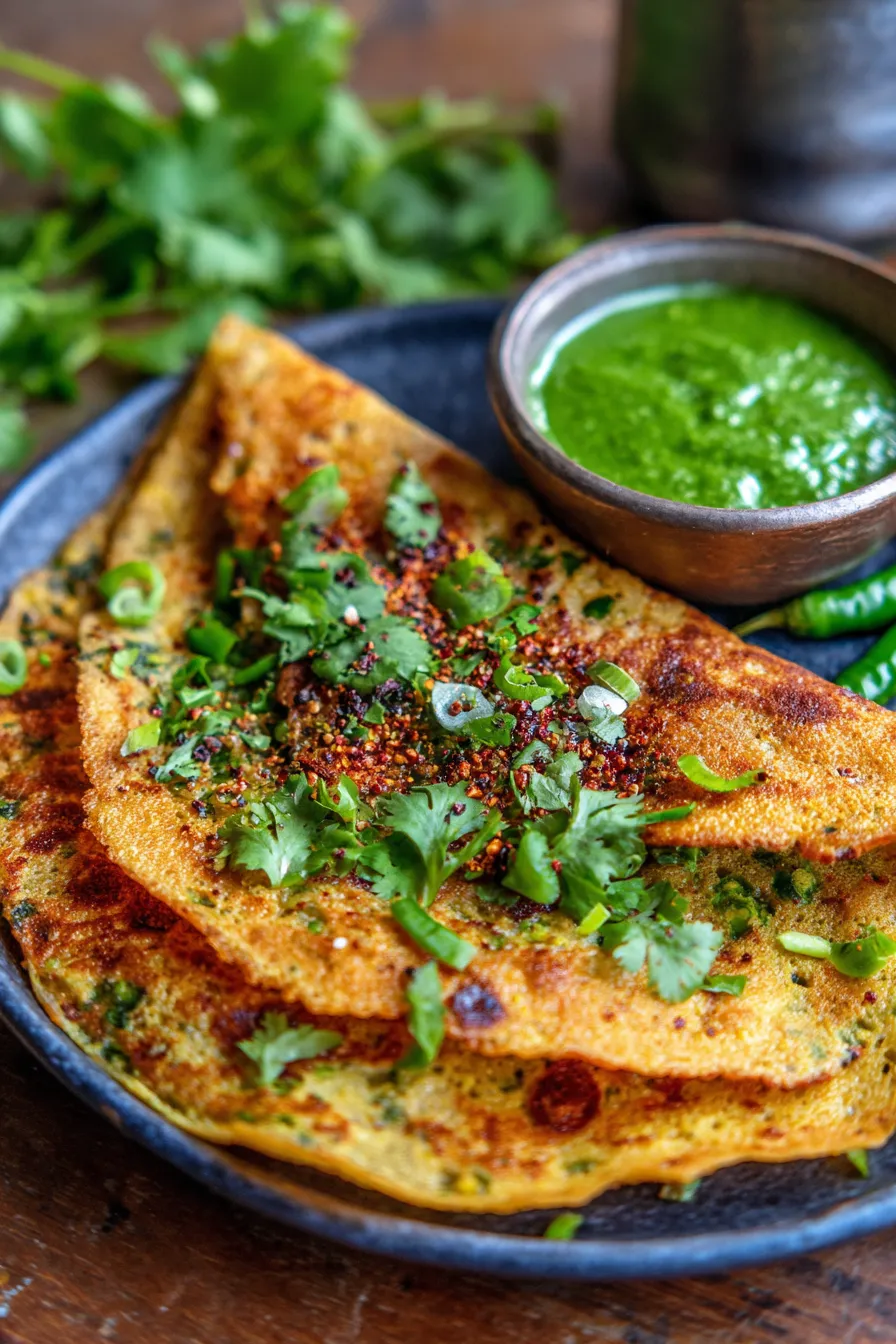
- Serve Immediately: Chillas are truly at their best when enjoyed fresh off the griddle! Serve them warm with your favorite chutney or pickle for an unforgettable experience.
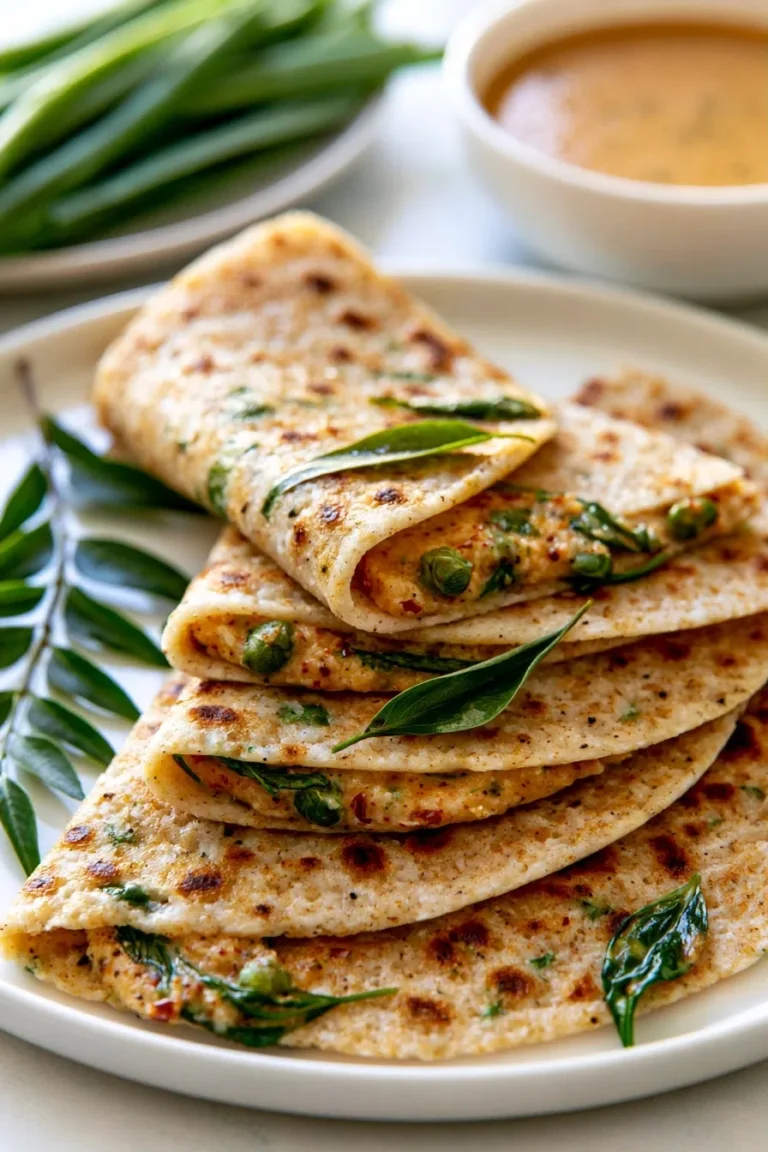
- Get Creative with Toppings: While delicious on their own, consider adding finely chopped onions, bell peppers, grated carrots, or even a sprinkle of grated vegan cheese to the batter for extra flavor and a nutritional boost.
- Rest the Batter: After blending, let the batter rest for 10-15 minutes. This allows the flavors to meld beautifully and gives the batter a chance to slightly ferment, which contributes to a lighter, fluffier texture in your finished chillas.
Variations & Substitutions
One of the best things about Moong Dal Chilla is how adaptable it is! Feel free to customize it to your taste and pantry availability:
- Spice Level: Easily adjust the amount of green chilies and red chili powder to suit your preference. For a milder version, especially for kids, you can omit the chilies entirely.
- Added Vegetables: Boost the nutrition and texture by mixing in finely chopped spinach, grated zucchini, corn kernels, or even finely diced bell peppers directly into the batter.
- Herbs: Experiment with fresh mint, finely chopped curry leaves, or even a touch of fenugreek leaves (methi) for a different aromatic profile and depth of flavor.
- Ginger-Garlic Paste: For a more pungent and robust flavor, add a teaspoon of fresh ginger-garlic paste to the batter mixture.
- Onion-Free/Garlic-Free: If you follow a no-onion, no-garlic diet, simply omit these ingredients. The chilla will still be wonderfully flavorful with the other spices and herbs.
- Protein Boost: For an extra kick of umami and B vitamins, stir in a spoonful of nutritional yeast into the batter. It adds a subtle ‘cheesy’ note without any dairy.
Storage & Freezing
Planning ahead? These chillas are great for meal prep!
- Storing Leftovers: Cooked moong dal chillas can be stored in an airtight container in the refrigerator for up to 2-3 days. To reheat, gently warm them on a pan over medium heat or in a microwave until they are soft and warm.
- Freezing Cooked Chillas: Once completely cooled, stack the chillas with small pieces of parchment paper in between each one to prevent sticking. Place them in a freezer-safe bag or container and freeze for up to 1 month. Thaw overnight in the refrigerator before reheating.
- Freezing Batter: The prepared chilla batter can be stored in an airtight container in the refrigerator for up to 1-2 days. While possible, I generally don’t recommend freezing the raw batter, as the texture can sometimes change upon thawing, affecting the final chilla consistency.
FAQ
Q: Can I use whole moong dal instead of split moong dal?
A: While split moong dal (dhuli moong dal) is traditionally preferred for its quicker cooking time and ability to create a super smooth batter, you can certainly use whole moong dal. Just ensure it’s soaked for a longer duration (typically 8-10 hours or overnight) and blended exceptionally smoothly to achieve a similar texture. Note that the color and the final texture might be slightly different.
Q: Why are my chillas sticking to the pan?
A: Chillas usually stick if your pan isn’t hot enough when you pour the batter, isn’t properly greased, or isn’t a good quality non-stick surface. Ensure your pan is adequately preheated before adding the batter, and add a little oil or cooking spray before cooking each chilla for best results.
Q: Can I make this ahead of time for meal prep?
A: Absolutely! The prepared chilla batter can be made and stored in an airtight container in the fridge for up to 1-2 days, making it perfect for quick breakfasts on busy mornings. Cooked chillas also store well and can be reheated, making them an excellent choice for healthy meal prep throughout the week.
Q: What do I serve with Moong Dal Chilla?
A: Moong Dal Chilla pairs wonderfully with a variety of accompaniments. Try it with a fresh mint-cilantro chutney, tangy tamarind chutney, a simple tomato ketchup, or even a side of plain vegan yogurt. A fresh green salad or a small bowl of Indian pickle also complements it beautifully.
Conclusion
I hope this Vegan Moong Dal Chilla recipe brings as much joy and deliciousness to your table as it does to mine. It’s a comforting, healthy, and incredibly versatile dish that’s perfect for any time of day, whether you’re starting your morning right or looking for a light, satisfying meal.
If you love this recipe, please consider leaving a star rating and comment below – your feedback truly means the world! Happy cooking, and don’t forget to Pin this recipe for later so you always have a healthy, hearty breakfast idea at your fingertips!
Vegan Moong Dal Chilla: Healthy & Easy Indian Breakfast!
Ingredients
- 1 cup split yellow moong dal (soaked)
- 1 inch ginger (grated or chopped)
- 1-2 green chilies (finely chopped, adjust to taste)
- 1/4 cup chopped onion (optional)
- 1/4 cup chopped cilantro
- 1/2 tsp turmeric powder
- 1 tsp cumin powder
- 1/2 tsp red chili powder (optional)
- Salt to taste
- Water (for blending)
- Oil for cooking (e.g., canola, sunflower)
Instructions
- Step 1 Rinse and soak moong dal for 4-6 hours or overnight. Drain thoroughly.
- Step 2 Combine soaked dal, ginger, green chilies, onion (if using), cilantro, turmeric, cumin, red chili powder (if using), and salt in a blender.
- Step 3 Add a little water (about 1/4 to 1/2 cup) and blend to a smooth, thick batter. Add more water as needed to reach pancake-like consistency.
- Step 4 Let the batter rest for 10-15 minutes.
- Step 5 Heat a non-stick pan or griddle over medium heat. Lightly grease with oil.
- Step 6 Pour a ladleful of batter onto the hot pan and gently spread it in a circular motion to form a thin chilla.
- Step 7 Drizzle a little oil around the edges and on top. Cook for 2-3 minutes until the edges start to crisp and lift.
- Step 8 Flip and cook on the other side for another 1-2 minutes until golden brown and cooked through.
- Step 9 Repeat with the remaining batter. Serve hot with chutney or pickle.